Showing posts with label Vietnam. Show all posts

Friday, 31 January 2025

Beyond Mig Alley - BRS - North Vietnam Rumble

Howdy folks,

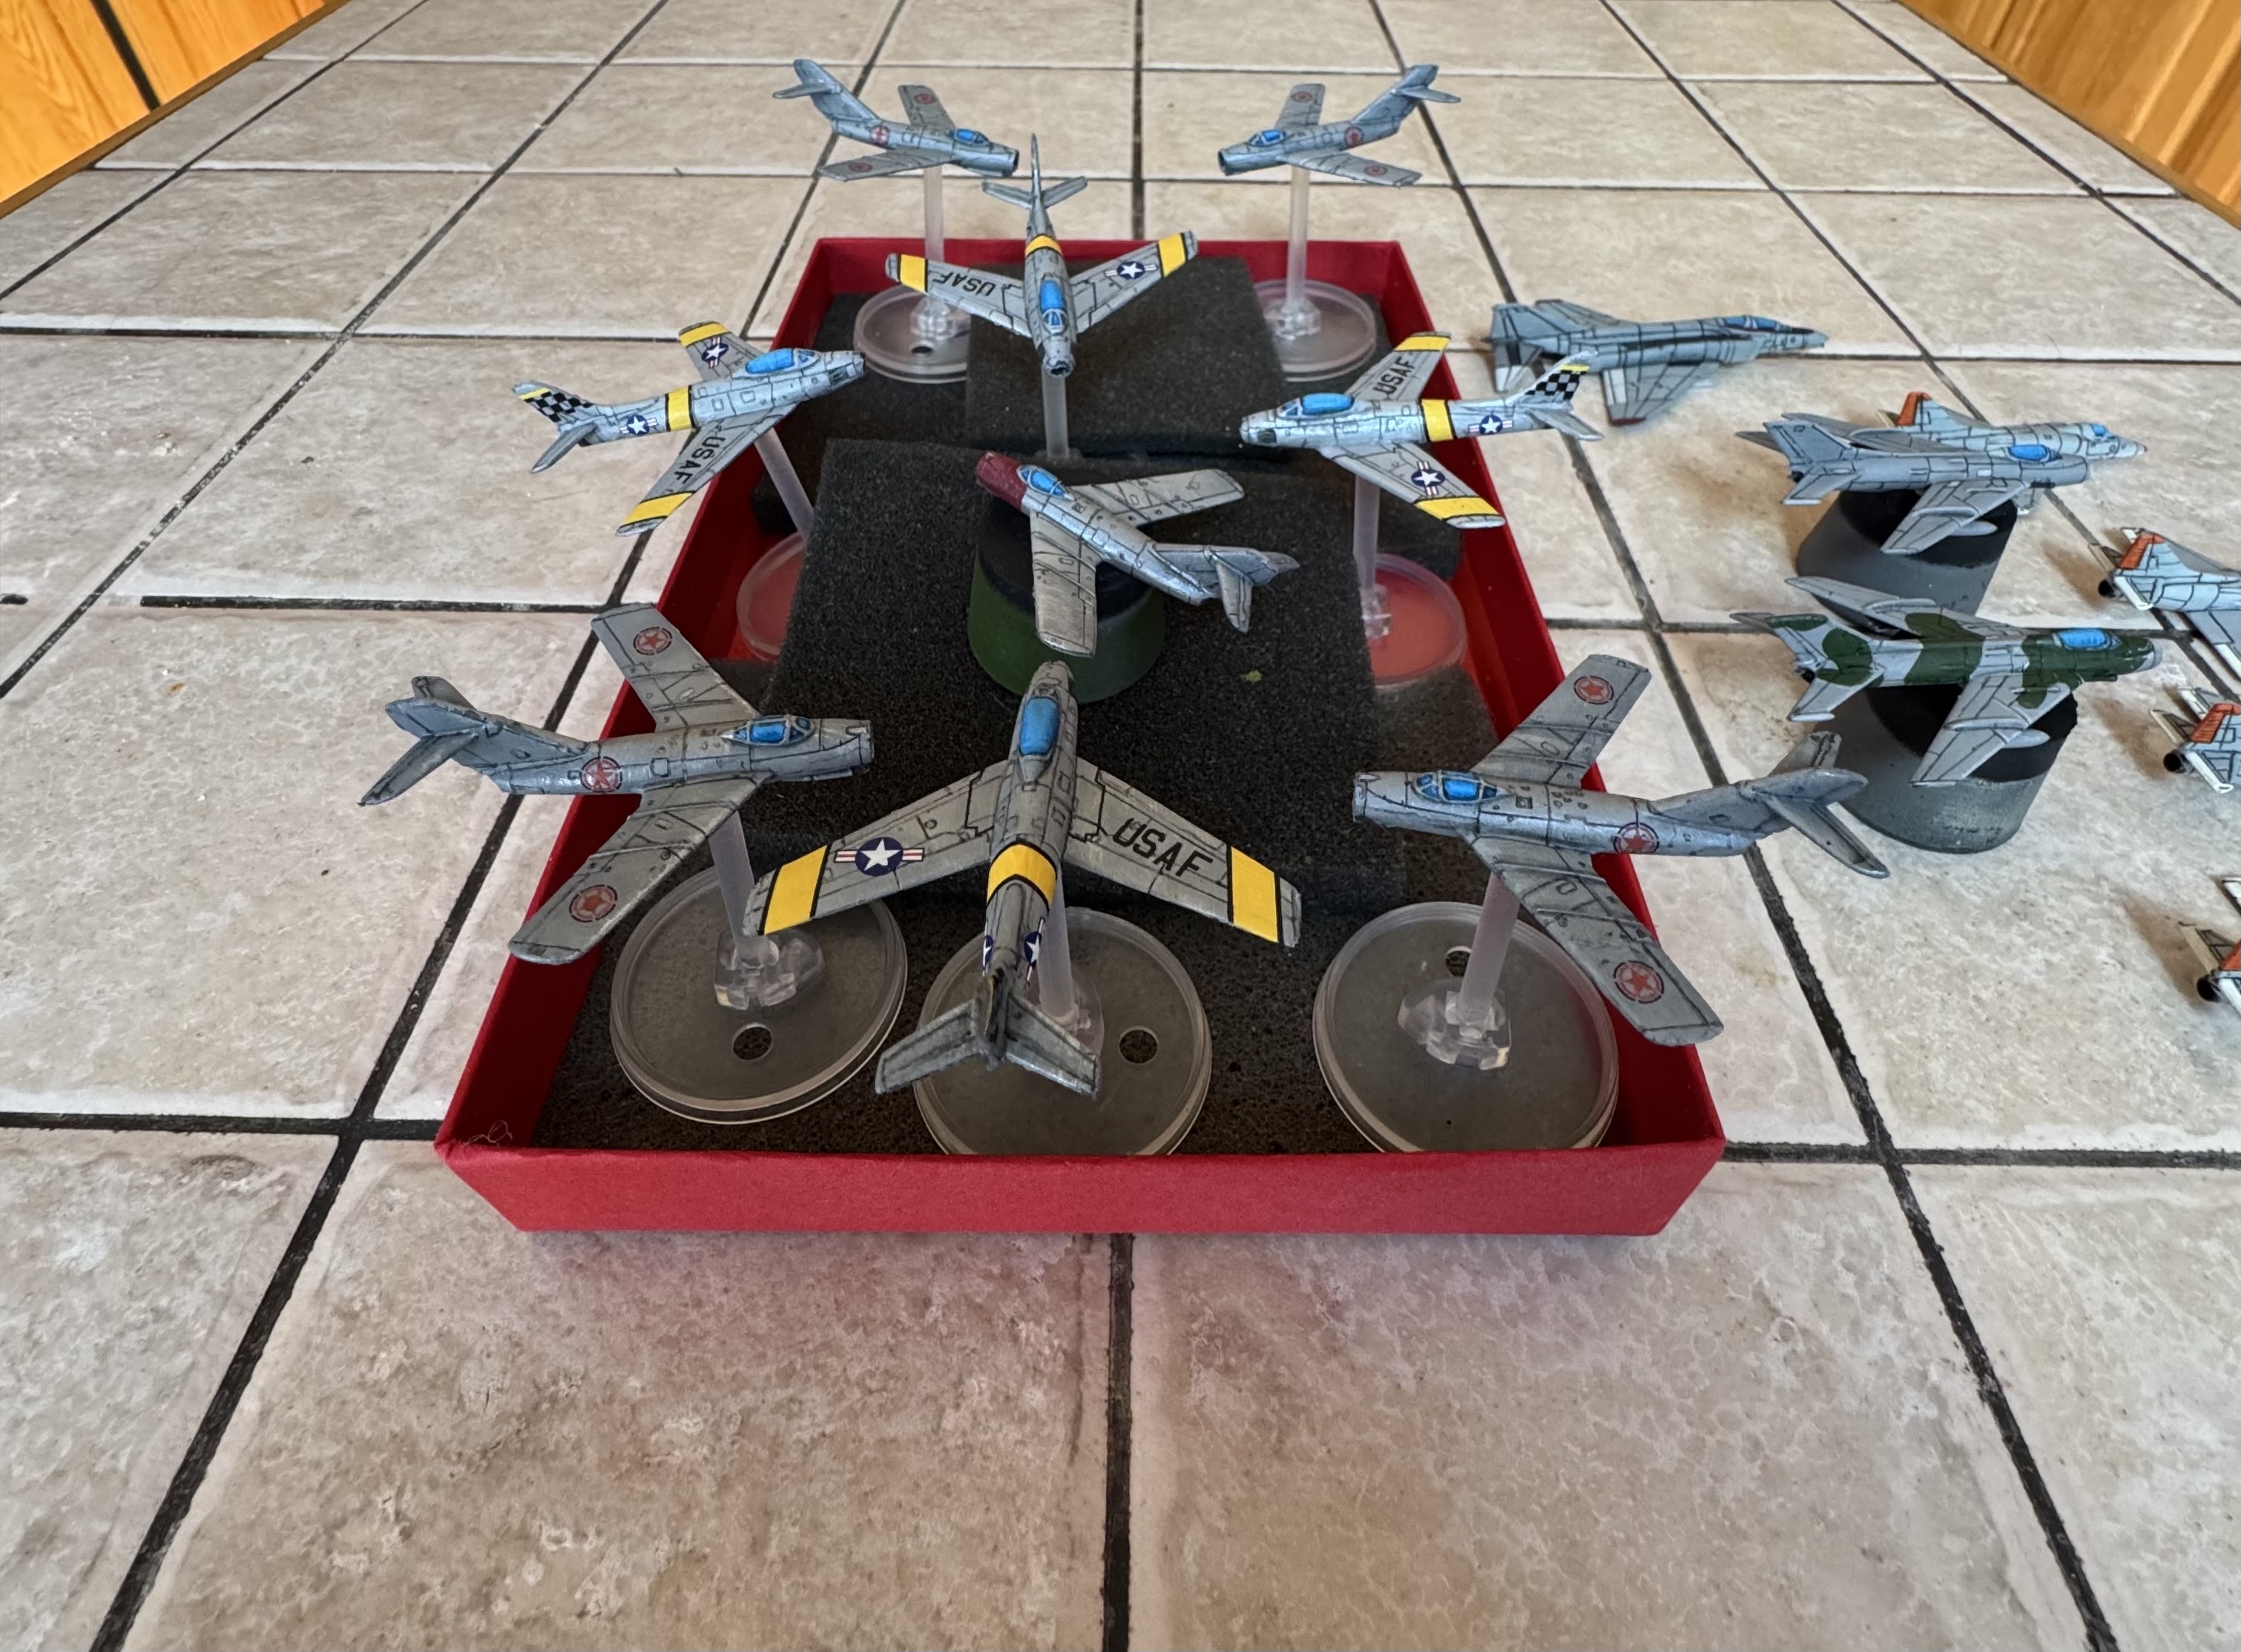
Here's to the first battle report of the year! I was able to get together with Duncan and Mike and we had the chance to give a try to Blood Red Skies/ Beyond Mig Alley. We have each been painting up fabulous aircraft that Duncan picked up from Lead Pursuit Podcast and this was a great chance to get them on the table.

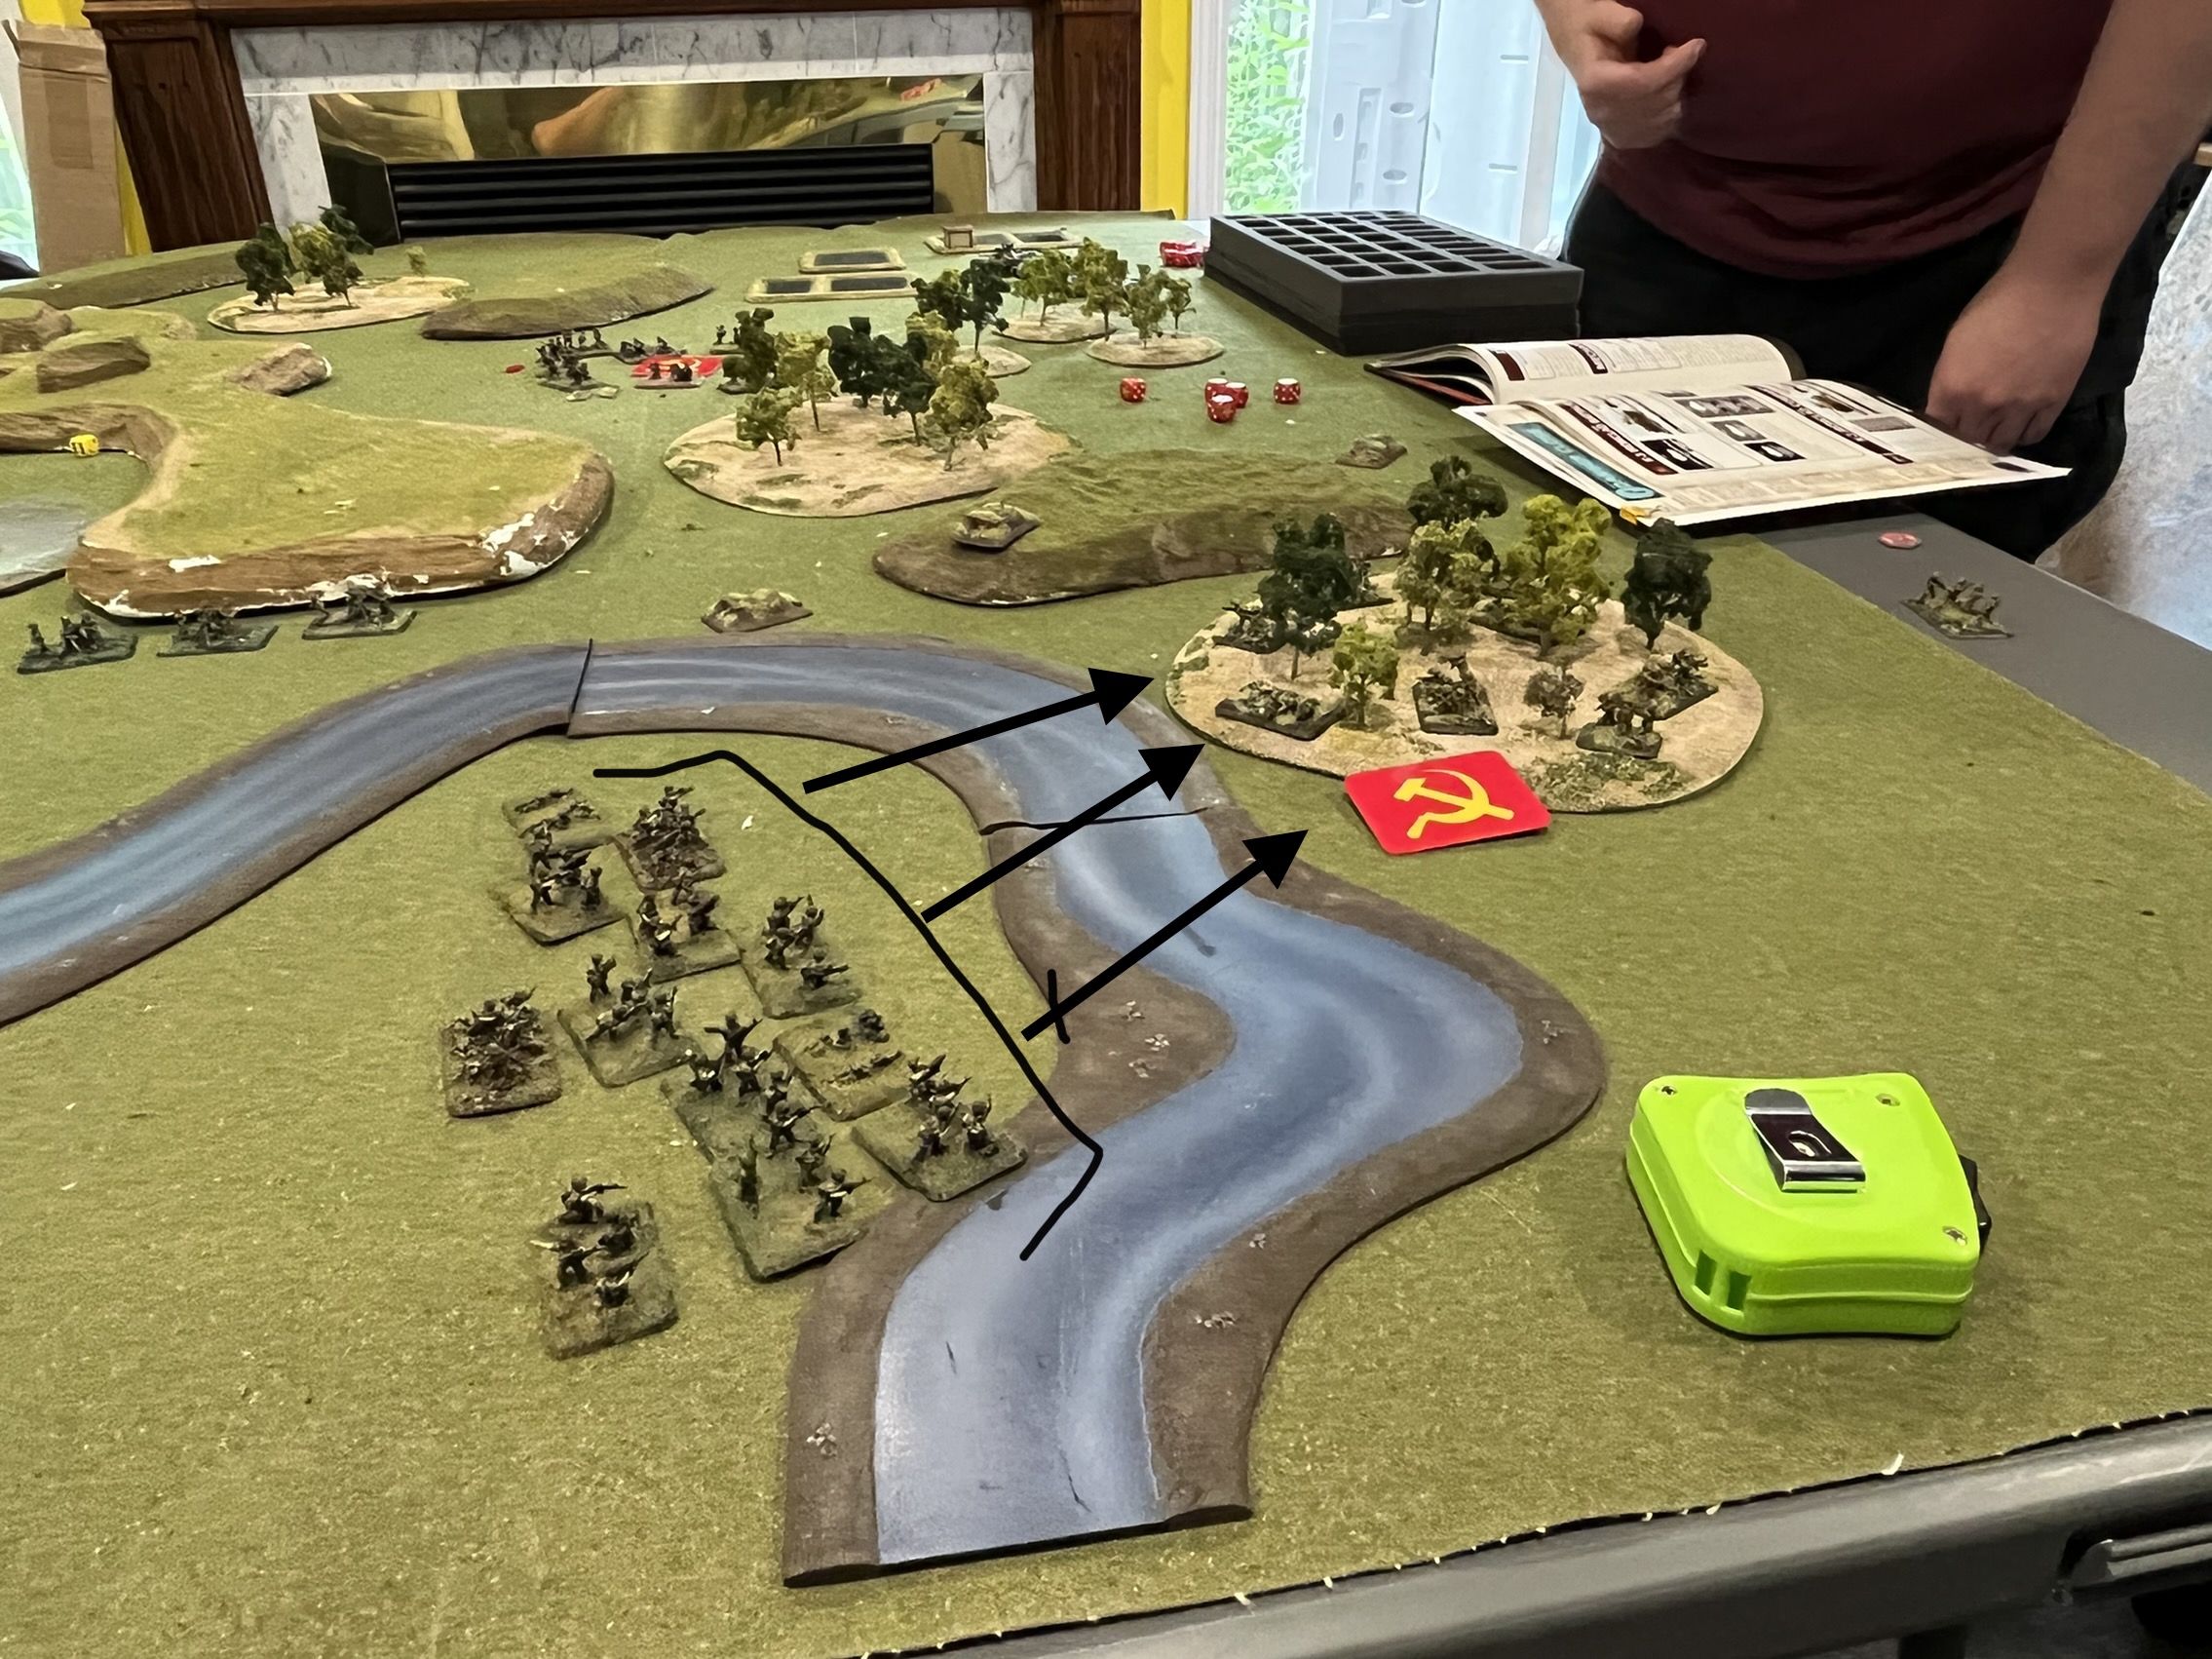
The setup for the game was Vietnam War, US aircraft are pre/post strike (actual timing was irrelevant) and they get 'bounced' or ambushed by North Vietnamese aircraft (Vietnam People's Air Force - VPAF). So force composition was:
  • US - 4 or 5 x F105 Thud's - strike aircraft, self-defense machinegun; 1 x F4 Phantom - air superiority on top cover, no gun, armed with AIM-7 and 9 air-to-air missiles; and
  • VPAF - 5 x Mig 19's - air superiority aircraft, air-to-air missiles and guns.
A few quick thoughts: it was a pretty fast paced affair, the missiles were a little frustrating (so maybe they lived up to their historical references), and the gun shots were epic. The jet age is extremely fast, even with the movement distance capped, several aircraft end up moving at the cap of 16” which is about 3-4 times the average speed of WW2 BRS.

The game was a lot of fun…Mike was on fire with his gun rolls…and definitely looking forward to next iterations.

And now the pics…enjoy.

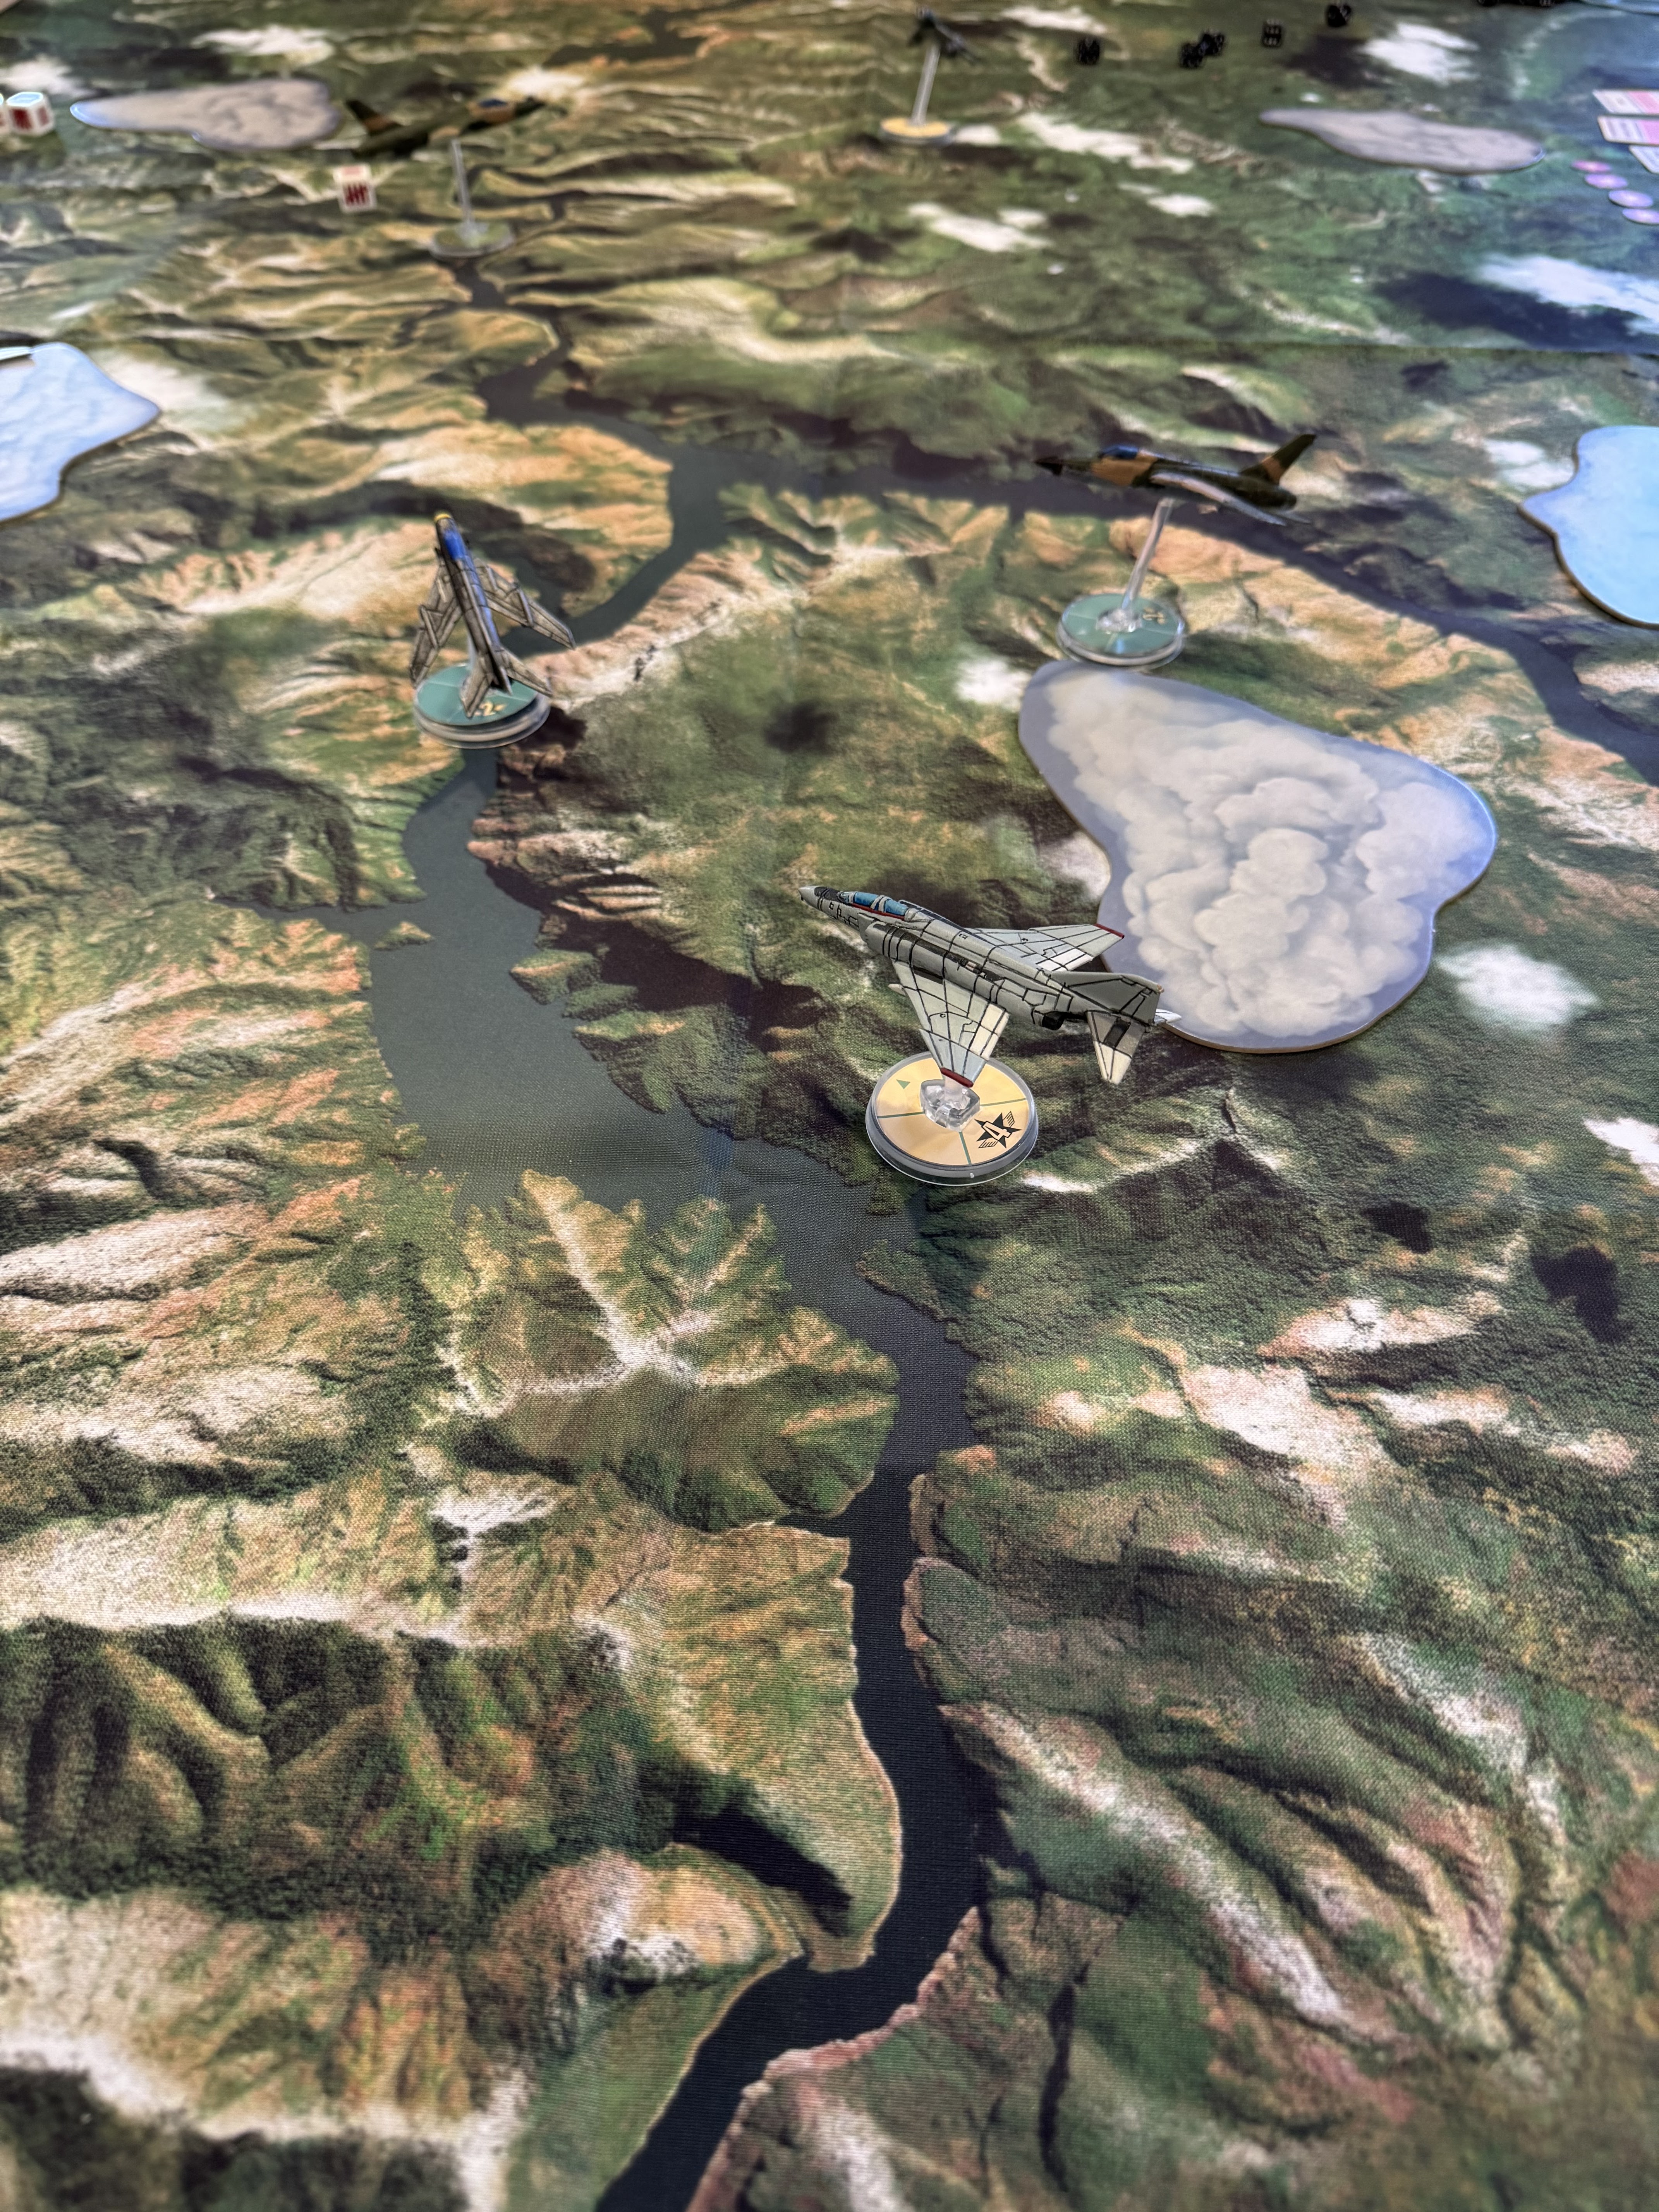
The Setup & Start: the Thuds blend in pretty good with the mat…but they’re heading South when a bunch of MiGs jump on their 6.

Mike was able to bounce in and be in advantage. If I remember correctly, Duncan’s Thuds were pushed to neutral. Mike lined up a few shots and is able to splash his first Thud. I think the MiG gets a heavy hitter rating and that ends up being pretty devastating. You can see the token where the Thud falls to the earth.


I was able to jump into the fight from my ‘high cover’ position on the edge of the table. I was able to take my full 16” move and get in behind the MiGs and reduce the advantage of one of Mike’s aircraft. Unfortunately the shot didn’t take, but it put him on the defensive a little.

Mike fended off my F4 attack, but was able to splash another Thud (second token on the table)

The furball move inch by inch on the table, Duncan was able to get into a tail chase situation as well, so Mike had to drive one of his MiGs into the clouds for cover. At this point we had taken enough boom chits that the Thuds would’ve left the field. Mike elected to keep the fight going…so we did.

Again, I try to line up a shot with my Phantom…no gun onboard really sucks, but I let loose another missile with no effect…or maybe I scored a damage, I can’t remember.

I try doing a maneuver in order to change my facing back northwards…given the characteristics of the F4,  this meant that the high G combined with the ‘complex’ layout kept me at neutral for the turn while the crew sorted out their bearings…

This gave Mike the chance jump in behind and put me at disadvantage which gave him the chance to hit me with a gun shot…which he did quite nicely…and down I went with a ticket to that fancy hotel in the North’s capital.


Monday, 30 December 2024

BRS - MiG Alley...and Beyond MiG Alley

Howdy folks,

I hope all is going well over the Christmas and holiday period for everyone. Continuing on with my latest distraction. Not only have I dipped my toe into the Korean War conflict with Warlord Games Blood Red Skies MiG Alley...I have also recently discovered Lead Pursuit Podcast who has license with Warlord to produce aircraft for said game. AND who also have license to produce aircraft for Blood Red Skies and Lead Pursuit's free expansion rules for beyond the 1950s. You can find them here, Lead Pursuit Podcast

I have 8 aircraft now, some A4's, a couple of F4's, and a couple of Mig 19's...these are 3d printed and are super super sharp looking aircraft. They are probably the cleanest 3d prints I've seen, and certainly some of the cleanest aircraft models I've seen. 

The models all came up very quickly, but I gotta say that right now my favourite are the MiG 19’s, they were the cleanest and took the paint really well. The detail and lining really came out well…I am somewhat disappointed with the F4 and A4’s, but they will definitely work for the tabletop.

Enjoy the pics. Take care.

Group shot of everyone…I painted up one of the MiG 15’s with a red nose after seeing a pic of the Soviet Air Forces paint scheme for their “advisors” flying with the North Koreans. I have one MiG 19 in plain gray paint scheme and the other with grey and green…both inspired by North Vietnam Air Force paint schemes. The pic includes aircraft from my previous post…the weather was above freezing today, so it was dullcote day.


The A4 tails were inspired by the paint scheme of the Skyhawk’s that were flying off the USS Independence circa 1965. I think I’ll keep them fairly clean, keep them rather generic for use with other Air Forces.

I am currently waiting for decals for the Phantoms, they will be getting the Sundowners tail…looks very cool and will really top of the F4’s.

Journey up Lead/Plastic Mountain

Painted

1/200          16, +12 (2 x Sabre’s, 3 x MiG 15, 2 x MiG 19, 1 x F4, 4 x A4)
15mm         214
28mm+       44

Fabricated

Terrain        2

Bought        24 

Progress   +252


Tuesday, 28 February 2023

Up River - Vietnam Battle Report

Hello one and all,

We’re edging towards the end of February, one snowfall warning after another…although the last one did not come to fruition, there was a pretty good snowfall this past weekend. Really nice snow too, temps were -10 to -15 so the snow was nice and powdery.

Best part of the weekend, I finally get to tally a battle report for this year in a setting that was as unsnowlike as possible, welcome to the Nam. For this installment, we have the black berets of the Riverine force and the grunts of the 9th Infantry. Duncan was keen to get his boats on the table and it gave  us a chance to literally throw some random figures on the table.

As always, Chairman Mike has gotten ahead of the media curve and is already spreading his propaganda.

Forces wise: Duncan and I had 2 x infantry platoons; 1 x monitor; 1 x transport carrier; and a special forces platoon. Mike had a mix of NVA and Main Force troops with 2-ish x infantry companies; ironclad company of 5 x pt76 tanks; air defense company of 3 x AAA HMG’s; combat support platoon with 3 x recoilless rifles; and a couple of HMG companies with 3 x hmg bunkers each.

Big thing up front…the riverine forces give an interesting array of weapons (the monitor had a 40mm gun,  a few 20mm’s - 3 I think, and a short range mortar), and tanks are still an interesting foe and can be surprisingly susceptible to M72 fire.

So here we go…

The battlefield…the great plains of the Nam, lol…we’ll need more scatter next time. The Up River mission has, well a river…a couple of sections, and is a search and evacuate mission with 5 objectives for each side to get to and search (free world) or evacuate (communist).

The initial deployment has the riverine forces moving up the narrow river towards mid table. The special forces insert near a small ridge via helo insertion and Mike has his tanks on field as well as a small infantry company. He has to roll for the rest of his forces from reserve.

The tiger stripe lad green faced men move quickly to get into contact with an objective.

Duncan takes a couple of hits on the monitor from Mike’s tanks…and then replies in kind knocking a few into oblivion…around this time, both boats offload their infantry and start the move towards securing objectives.

Mike rolls really well for his reserves, not to mention where they can deploy. He sends his recoilless rifles to the backside of the hill to harass the closest infantry platoon.

I try to make my roll for the objective, 6 to successfully search…only to have Mike successfully deploy his first HMG bunker company. They throw out an impressive amount of dice and there’s a lot of space between my SOF and them…and I need to clear the objective before I can move.

SOF taking some hard hits from the bunker…another roll, still lacking 6’s…

The tanks are dealt with for the most part - 2 left chilling behind an objective…Duncan’s platoon is moving towards the objective trying to search it as well…the red dice show that some of our stands are wounded. Near the bottom, I successfully search my objective and start to move towards the recoilless rifles.

The infantry start to edge towards the 76’s to get some LAW shots…and Mike gets his second set of bunkers at the top edge. Losing a couple of stands due to incoming fire…and I’m moving closer to the rifles in the south.

You an see Mike start to move his other infantry company towards my SOF…they’ve gone to ground so have been a little harder to hit, in the end it just delayed the inevitable. You can see the wounds start to happen…

Near the north part of the table, the US infantry have run off the PT-76’s and have an infantry company of their own to contend with. And still the objective is elusive.

The VC Main Force are able to charge into contact, I think they lose a stand on defensive fire…when you’re pinned, the M79 buckshot is sure a nice bonus!! Ultimately they are overrun - ironically Mike is unable to roll 6’s for the objective as well…lol

Duncan has his own assault step and counter to go through…if I recall correctly, he chews up the NVA infantry pretty well, taking a few wounds in the process, and falls back towards the troop carrier. With a few wounds in the south, I turn thought to finishing off the recoilless rifles.

Keeping the wounded to establish a base of fire, the remainder of the platoon charges into contact, swims past the defensive fire, and scores a victory for the good guys…5 rolls for assault, 5 hits!!

The game ends at this point…with 1 objective each for Free Forces and Communist, we land at a political victory for both forces. Stars and Stripes will tell wild tales of VC blood trails, special forces heroics, and a valiant assault. Hanoi Hannah will tell of brave Vietnamese standing up to Uncle Sam as they run away leaving behind their own men…definitely sounds victorious!!


Sunday, 26 June 2022

Airmobile! The Nam battle report - Hot LZ scenario

Howdy folks,

I hope you are all well on this warm weekend, it has been an interesting summer thus far, and with the weather of the weekend folks are looking to the skies for any signs of weather. No better time to take a jump into The Nam; we had a flurry of painting and thoughts about getting into The Nam last year so it is good to start getting metal on the table.

For our first foray, Mike selected the “Hot LZ” mission from the Nam book. Big picture, the US forces (Duncan and I) deploy 1 unit on table within 12 inches of an objective placed in the general area of the table centre. A second objective is placed in any corner by the Nationalist player (Mike). The remainder of  the US forces are back at the Firebase gearing up and getting ready to board the Hueys. In this case, Nationalist forces are held in immediate scattered reserves waiting for the right time to deploy and close their trap. For this scenario the US forces are defending the objective they placed and can win by taking the objective in the table corner. The Nationalist’s are pushing hard for the centre.

Duncan and I had a US Airmobile Company with 1 x HQ element; 1 x medic team; 2 x combat platoons (riflemen with 2 x M60 teams); 4 x Hueys for transport (forces have to be airlifted into battle); and 2 x Aeroweapons platoons with 2 x Cobras.

Mike has already beaten me to the punch on this one, his battle report and propaganda piece is best read with the voice of Hanoi Hanna in your head. If I remember correctly, his force included a PAVN infantry battalion with 2 x infantry companies; HQ element; 1 x anti-air platoon; 1 x recoilless gun platoon; 3 x machine gun bunkers; and a K-3 Ironclad company of 5 x PT-76 amphibious tanks. I think the book doesn’t allow this type of support, but we made the forcelists up on the fly, and it was all good.

All in all, a frustratingly good game, some tense moments as we were trying to get a grip on handling the helos and their pros/cons. Hope you enjoy the pics…


Initial setup with both objectives in view, the centre with initial US chalk inserted and the second at the bottom right of the picture.

Mike does a pretty good job rolling for his immediate reserves and is able to deploy the bunkers and his first company (they deploy near the bottom objective). The bunkers do a good job of mucking up the line of approach between both objectives…and end up giving some pause to the helos trying to control the table.

Bigger view of the table…

We take a few hits from the bunkers, no big effects…we decided to spring the first Cobra flight behind the arcs of fire for the bunkers…and screen the Huey’s dropping our second platoon. We hit the objective and trees with a rocket salvo killing an infantry team.

Mike rolls again for reserves and brings on the anti-air platoon…the guerilla fighters rule gives Mike some latitude in deployment, the 12.7’s end up deploying across the river near a subtle hill. They quickly lay down some impressive fire and down a Cobra. The Huey’s dump the troops and get back to the staging base and the grunts start humping to the objective in line with M60’s in the front rank.

Mike brings in his K3 company and they put some main gun fire to the table centre, putting pressure on the first platoon. He also brings down the second Cobra that we had on table.

The second platoon get themselves ready to push the objective an start rushing the stream (looks much deeper than it was) and prepping for an assault. The platoon makes sure to leave clear firing lanes for the M60 teams to try to pin the NVA.

Between this pic and the one prior, I did not keep up…so the US forces launched and assault and successfully pushed the NVA off the objective. We brought in our second Cobra flight to help cover the second platoon. 

Of course, as you see in the top pic, Mike is able to down another Cobra. The second platoon rallies and preps for another assault across the stream. As the bottom pic shows, it was a very successful assault and heavily prepped by Cobra mg fire as well as clear lanes for the M60’s.

If I remember correctly, the second platoon wipes out the NVA company, and with the Born in the North to Die in the South rule, Mike successfully rolled to bring them back on as a new unit. Leading up to this assault, we also elected to split the fire of the second platoon to support both the assault and also bring the ant-air platoon under fire. M60 and rifle team fire successfully take out that unit.

Second platoon consolidating their gains.

Starting the turn with the objective in our possession, the US forces win the game. Given the losses it is a little bit of a hollow victory…and chances are that command is just going to bring the boys back to staging and Firebase. The one saving grace was that the first platoon was able to stay dug-in and gone to ground and weather the fire from the K3 company with very limited casualties.

So in the end, Mike scored 6 victory points for the downed Cobras and 2 units destroyed. The good guys ended up with 2 points for destroyed units. While we took and held the objective there was a cost.

QUICK THOUGHTS:
1. Frustrating at points because our deployment ended up hedging us into a bit of a corner with little room to move - at least not like we wanted to; 
2. The ‘buckshot’ rule is pretty damned handy on the defense. M16 rifle teams are armed with both M72s and M79 bloopers. The buckshot round fired by the blooper gives the equivalent of a +1 to the rate of fire for defensive fire…which is really handy when pinned;
3. Choppers are handy, but damned fragile;
4. The wounds rule for Free Forces does make it hard to kill infantry teams; and
5. I really like the victory points tally table, and it can give a bit of an interesting spin on wins/losses

Finally, we ended up enjoying the game much more than we thought…so the painting to date has not been for naught, lol…more to follow.

Saturday, 13 November 2021

Let Me See Your WARFACE - Grunts for The Nam

Howdy folks, 
 
I hope you are all fine and well. As the title to this post says, its all about the grunts on this one.


Continuing my latest bout of inspiration and motivation around  gaming some of The Nam and fashion this around a Vietnam Aces campaign, I am finally getting to some additional combat platoons. Having a quick planning discussion with the guys, we are anticipating 20/40/60/?? as the point levels for this venture, and I think I've said before this is pretty consistent with the Aces escalation campaign format that BattleFront came out with.

Now, given my past interest in the era and original painting run with my Air Cavalry force, I was already prepped...my Air Cav was good to go for a few rounds worth of escalation. However, given that we will be having a random number of battles per round, I thought it would also be good to have some options and maybe another force on the field with some flexibility in deployment/back story.
 
You can see the summary of my previous painting for my Air Cav...I almost choked when I saw it was from 2015. To be honest, I still have some rotors to finish up...sigh.
 

So, as you can see from the video above, my main inspiration for this force was around the Marines and the rifle company. I've already painted up some M60 teams to go with my combat platoons, but with this post, you will see that I now have 20 stands of infantry for 2 x Marine combat platoons - which is more than enough for round 1 and gets me part way to round 2. And, if I really look for flexibility, I can re-jig these grunts into an Airmobile or leg infantry rifle company with 3 platoons. Of course, to do that I will need to add in a few stands (another 2 x M60, maybe some 90mm antitank teams, and one more infantry stand) so that I could have 3 platoons with 7 stands each.

Anywho, here are my grunts for the Nam, 20 stands of combat platoon hell to unleash, and course 2 stands of formation commanding goodness.

Have a good one.

OOH-RAH MARINES!!! The combat power of the force... 


I have to say, the BattleFront Vietnam figures have really progressed over time from their initial Wargames Illustrated run to the AUS/NZ infantry figures. The poses have become more dynamic and the sculpting of individual kit got much better and improved. The AUS/NZ troops really are the Cadillac of the range.  You can see the mix of the range throughout the platoons, but really evident in the Formation Command stands. 


2 x Marine Combat Platoons, now becomes 3 x US Army Platoons. All I need now is to fill out the numbers with another Platoon Command stand, 2 x M60 teams, and 1 x Medic/Corpsman for the company.

Lead Mountain 2021
Painted:
 
Large scale              3
28mm                     23
15mm                   102, +78

Bought                  24

Progress               +104