Showing posts with label painting. Show all posts

Saturday, 13 January 2024

Hello There 20-24

Hey everyone,

Winter is finally upon us…we made it until the second week of January before we saw any snow to follow-up our original snowfall back in mid November. Depending on where you are in Canada right now you are potentially feeling some -40 to -50 Celsius weather, and in some areas that very rarely get any subzero temps…so stay warm Canada.

So, with the dawning of the new year, I guess its time for the mandatory review and some forward thought…last year, my plan was fairly straight forward (I think): paint up more figures, focus on 15mm, get some more gaming in, try some new games, and work through the pile of lead (shame). By year’s end, I was sitting around 133 x 15mm figs painted (vehicle and troops) and 62 x 28mm figs…not my best output, and certainly not my worst output. I worked through a bunch of moderns and Team Yankee figs and I was happy that I started to get into some old starter/expansion boxes that I had laying about.

I didn’t game as much as I wanted to, but I was really happy that I got to give Marvel Crisis Protocol a shot and really enjoyed the game and mechanics. It was pretty cool, finally seeing some figs on the table. 

I had intended on working towards some set projects, but admittedly, I just couldn’t muster the focus. I put plenty of thought towards Afropia, but most of it stayed in the brain pan…although, I did work through some 15mm Team Yankee Red Dawn Insurgents/Militia that will fit in nicely. Funny enough, in the last week before end-year, I ended up looking through some of my terrain collection, put some thoughts towards potential actions, and am thinking that I may need to do a re-think and sync on the project.

So, that leads into the soothsaying and what will the next year hold. Painting more is an ongoing objective, I have plenty in the pile to work through, and some great looking MCP characters to bring to life. So that will continue to be a thing. With the release of NATO Forces, I have some Canadian Airborne Regiment and Special Service Force troops to put together for a continental Canada force. I had started a Cold War scenario some time ago, so I will continue developing that. I have been painting up a good amount of moderns over the last 2 years, so I would like to see them get to the table.

I think I will try to focus my efforts around the following projects and see how it goes:

1. Work on a proper Red/Northern Dawn scenario, ideally 2 of them, and that includes the terrain to get it to the table. So, I would like to work through the VDV starter box, and fill out my Cdn Abn Regt;
2. Work on a 15mm scenario inspired by some of the Bush War actions, I think this will be a good kickstart for me to push som progress on the greater Afropia idea - and really work on some of the wider mechanics and construct of that verse; 
3. I’d like to get some moderns to the table, so thinking of either Danger Close, Spectre Ops, or Force on Force, but moreso a limited small action scenario; and
4. Continue with MCP…and get my Hoth force for Star Wars Legion moving.

I think that covers enough variance over genre…and approaches more of the lead pile. So, we’ll see how we go over the next few months and start getting onto the verse’s.

Take care folks.

Friday, 29 July 2022

Painting Update - Basing Colours

Howdy Folks,

Happy end July to everyone...the month has surprisingly gone by very quickly, and definitely seen some interesting weather come through the province. The last week has been especially interesting given how much changing air pressure messes with my injuries...and last nights weather really was quite something to watch. Luckily all safe here, most of the really 'interesting' stuff developed south and east of us, and I hope all is safe where you are interneting.

For this post, I thought I would give a psuedo painting update and quick tutorial or guide on how I paint up my bases. The idea came for this came from a Reddit post I saw where someone was looking for some advice on getting more texture and colour out of their base painting. I've done this before in the past with some Cold War Infantry from Battlefront, as you will see at the link and below, I definitely have a system and standard-ish scheme that I like to use.

Hope this is of us...have a good one.

All figures are from Empress Miniatures and unless stated I'm using Vallejo, from left to right I have 3 different colours. Base colour is Burnt Umber, then dryish brush of Flat Earth, and then a dryer brush of Beige Brown.

I then had the idea of just putting the paint bottle behind the figure so you could see the name of the paint and the progress of the layers. So as above, left to right, with the inclusion of a standing sniper at the bottom of the pic. In this case, the base layer is still Burnt Umber and then dryish of Desert Yellow.

So you can see the next layer for each model, again left to right with Flat Earth for prone sniper, Beige Brown for green jacket, and Tan Earth for green toque.

Progressing the figs...I'm now adding Iraqi Sand for green toque, a fairly dry brush of that, I don't want it to overpower, just to lighten a little.

For my standing sniper, I thought I'd catch up...Desert Yellow was layer two, and then a dry brush of Iraqi Sand to make stuff pop...my next step will be to flock and overcoat...you'll see the finished figure on a follow-up post.

Just catching the other figures up...you can see Tan Earth for the prone dude, and Iraqi Sand now for green jacket.

For prone dude, I added some Army Painter Strong Tone to the base and I'm just hitting creases and areas that I want shadowed tone. Helps to break up the terrain from the figure and give some depths, especially to the improvised wall he has built up in front of him.
 
Overhead shot...just trying to capture the various tones and shades...

And in case anyone is curious on what I used for these bases, I do often use Citadel technical paints...I really do like the, they're pretty handy and makes some of the basework easier...especially when I am feeling lazy and don't want to break out my filler or sand.


Again, hope this is of help...Cheers!

Tuesday, 29 June 2021

Another Painting Contest Down - Main Man Fred

 Hello all,

Jumping on my recent success with February’s painting contest with Red Dragon, I thought I’d keep up the momentum and try this ‘thing’ out again. For the most part, I think entry requirements were pretty much the same: purchase a 3D printed piece from their catalogue or (this time) purchase a certain amount of warhammer stuff and you’re good to go.

For this go, I ended up choosing a great looking bust of Freddy Krueger…not only did it look great, but my wife was a big Elm Street fan, so that helped the decision. It also gave a great excuse to rewatch the original Nightmare for the requisite research.

I’m happy to say the research and efforts paid off and I walked away with a win for Fred and an awesome Turbodork paintset for my efforts. I hope you enjoy the pics (I had to take a buttload for the contest).


Lead Mountain - 2021
Painted:
 
Large scale            3, +1 (Freddy)
28mm                    9

Bought                  6, +1 (Freddy)
Progress              +6
 

Tuesday, 27 April 2021

Painting Contest - a different direction

 Howdy folks,

I hope all is going well...we are in our third wave, so I hope you are all coping well and getting some outdoor exercise time! Earlier this year, my newest LGS, Red Dragon Games, posted on their instagram that they were going to hold a contest for February. In spite of the lock downs and various restrictions, the folks at Red Dragon adapted very well and the contest went off, mostly as planned.

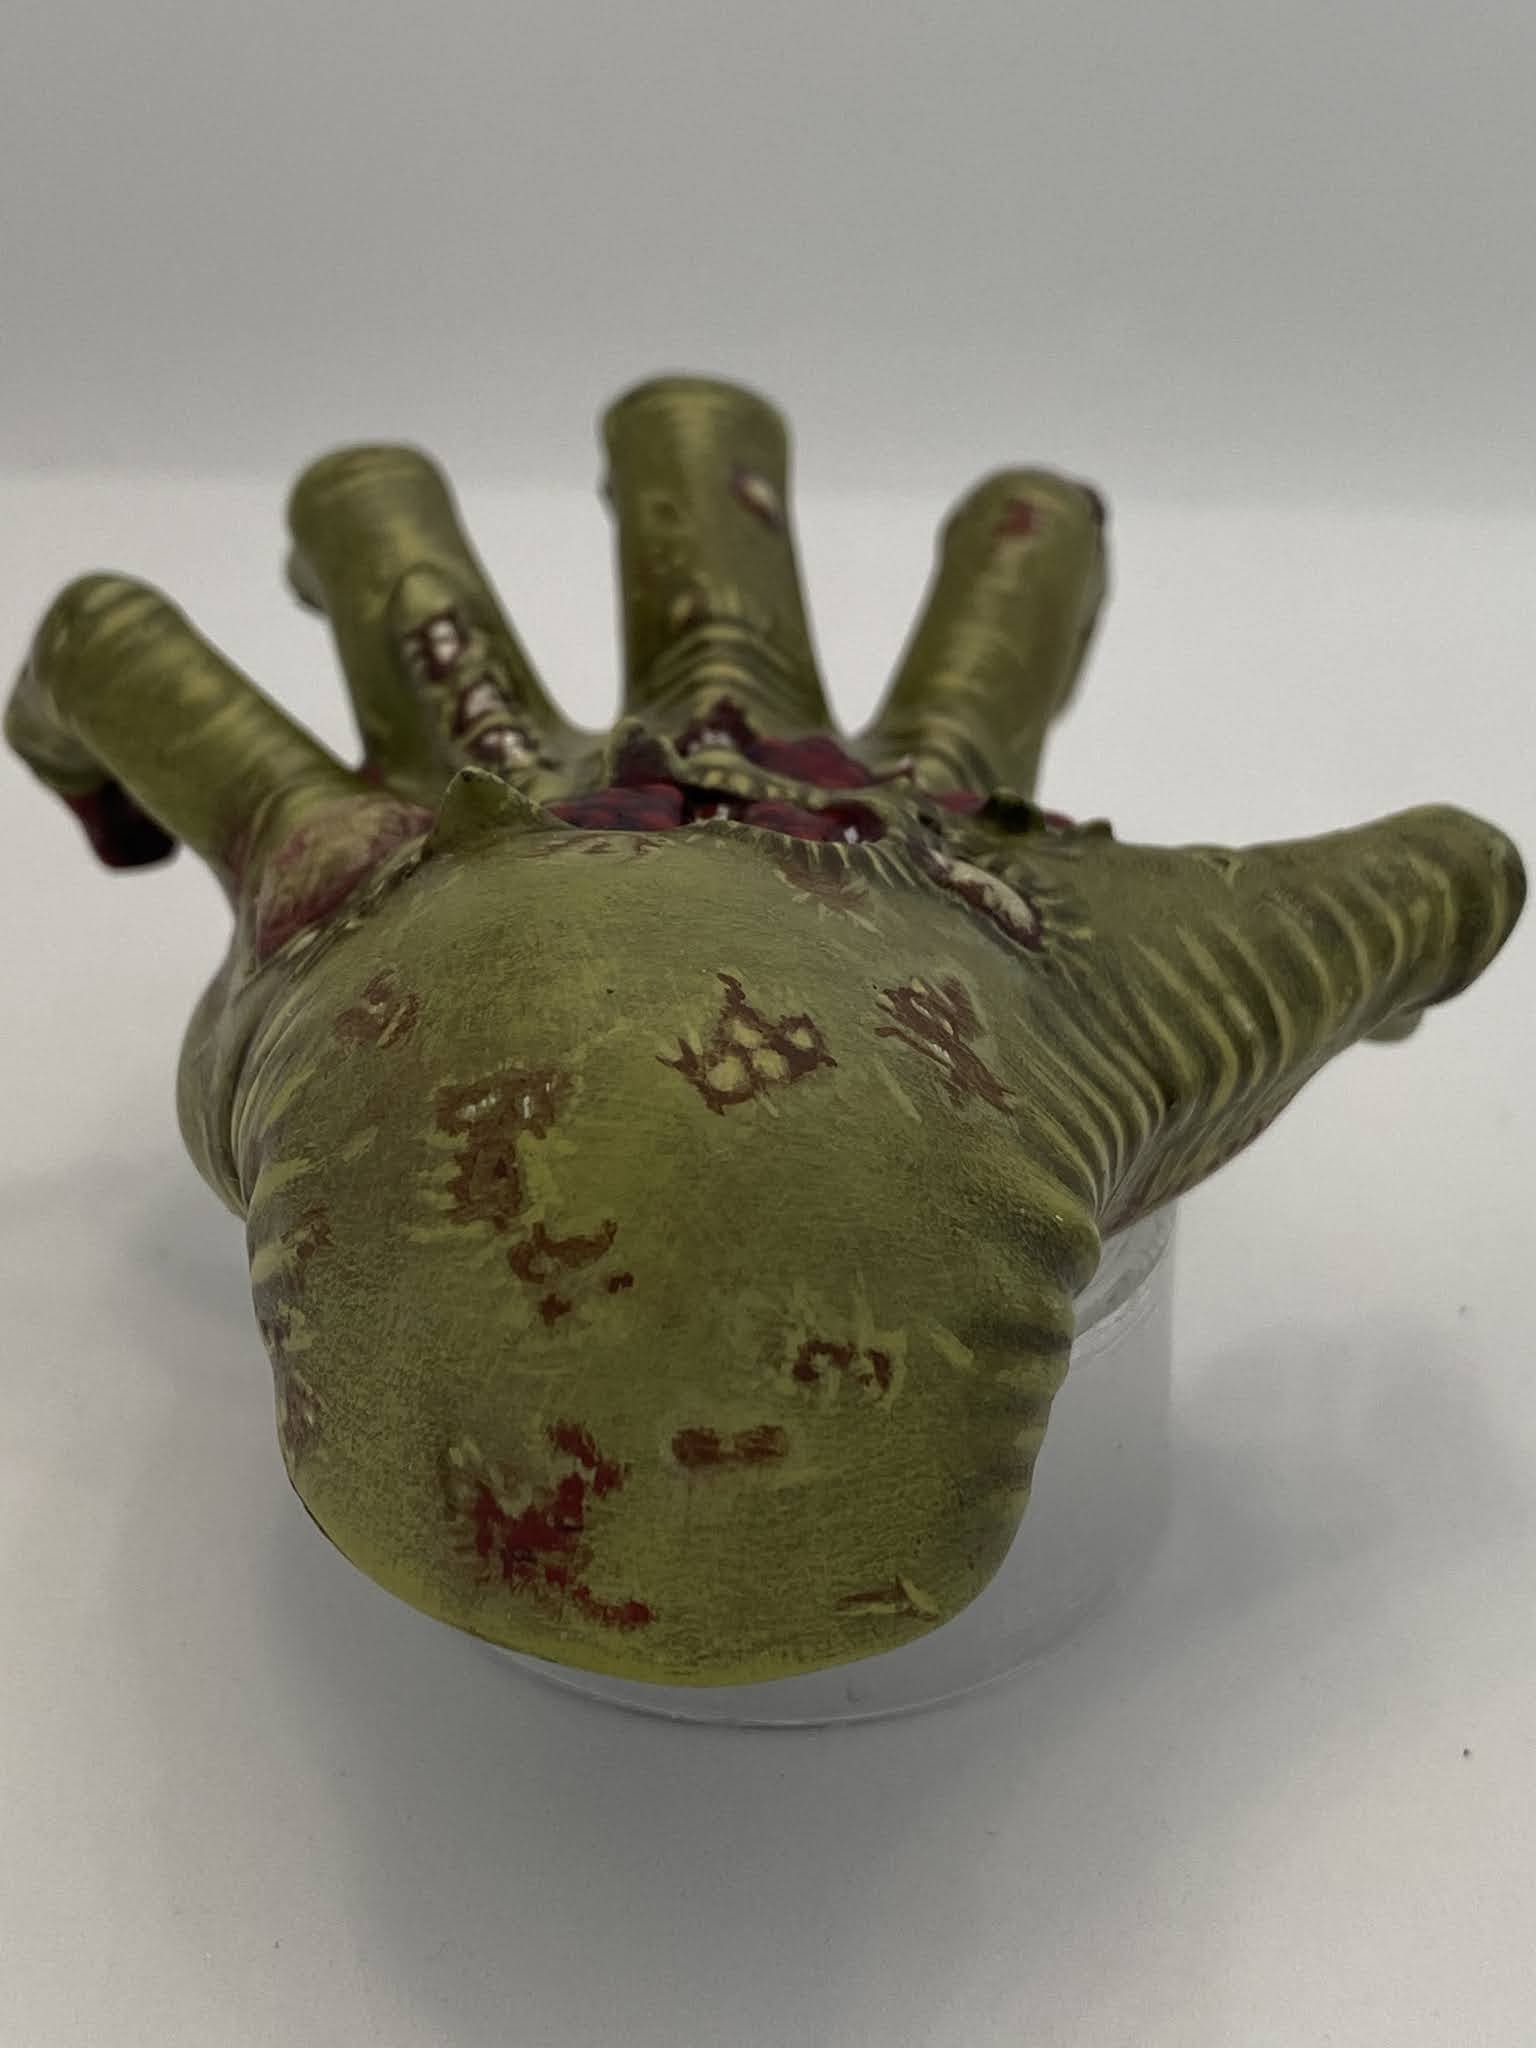
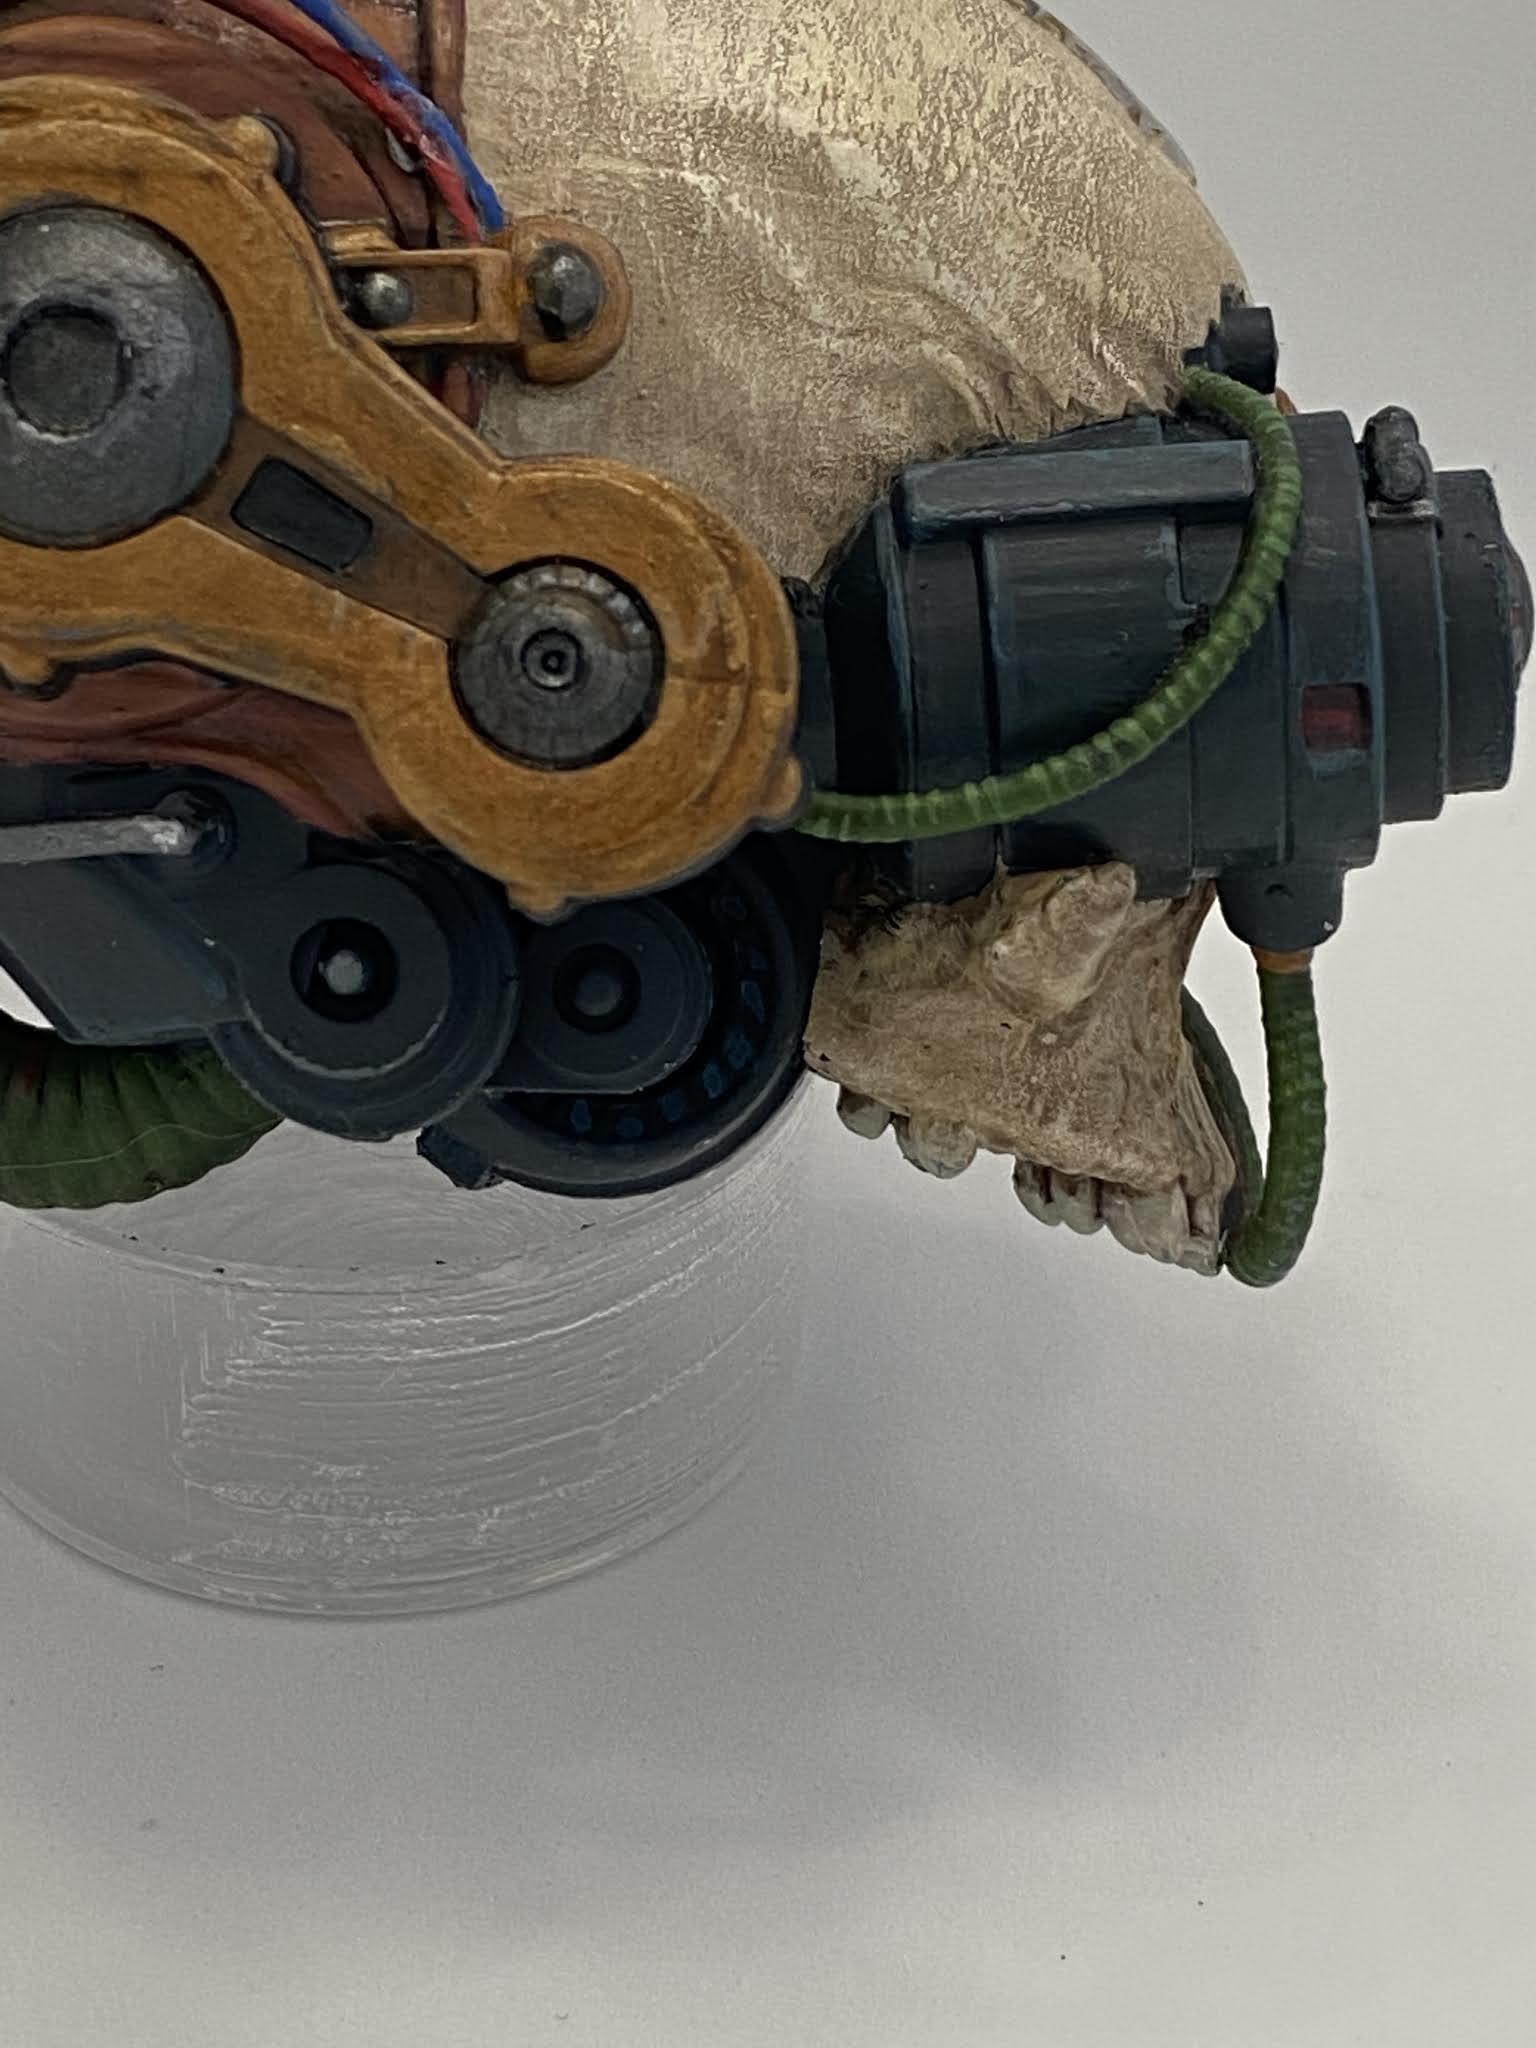
The cost to enter was the purchase of a 3D printed model from their inventory...they have an excellent selection of models for print on demand. For this I elected a very 'simple' looking zombie hand and a warhammery-kriegsy-cyberpunky looking skull. I'm sure its from some fandom and 'verse somewhere, but I have no idea...but it looked really cool.

For the most part, I have steered clear of painting contests...partially due to humility and always knowing there are others who paint better than I...partially due to previous experience (I entered a contest at a convention, unfortunately they put all the figs in a corner away from onlookers...so not really ideal exposure, especially since it was a vote based judgement, and another was online, vote based, and quickly degenerated into spam accounts, flame mails, etc...).

Happy to say though, the end result was a win for my Zombie hand and an honourable mention for the skull, and some great looking figures posted on the store's instagram account. For the painting, it was a lot of fun, definitely a different direction, and painting on a much different scale (pun-intended). And yes, there is another contest on the horizon for June...so yeah, I've got my figures, I just have to get painting.

Enjoy some pics! Take care.


Lead Mountain - 2021

Painted:
large scale        +2 (zombie hand, skull)
 

Bought:           +2

Progress:        even steven


Thursday, 31 December 2020

The 8th Post Over Christmas...

For my eighth post over Christmas,
I thought I would write up for you...
An 8 (-ish) step tutorial...
...for basing the figures you do...
 

7 Harry Potter figures...
6 Marvel Characters (heroes and/or villains)...

FIVE MAIN CHARACTERS...<cough...from the Night’s Watch starter set>

2 figures from Studio Miniatures; and
1 from HassleFree.
 
 
Hello folks,
 
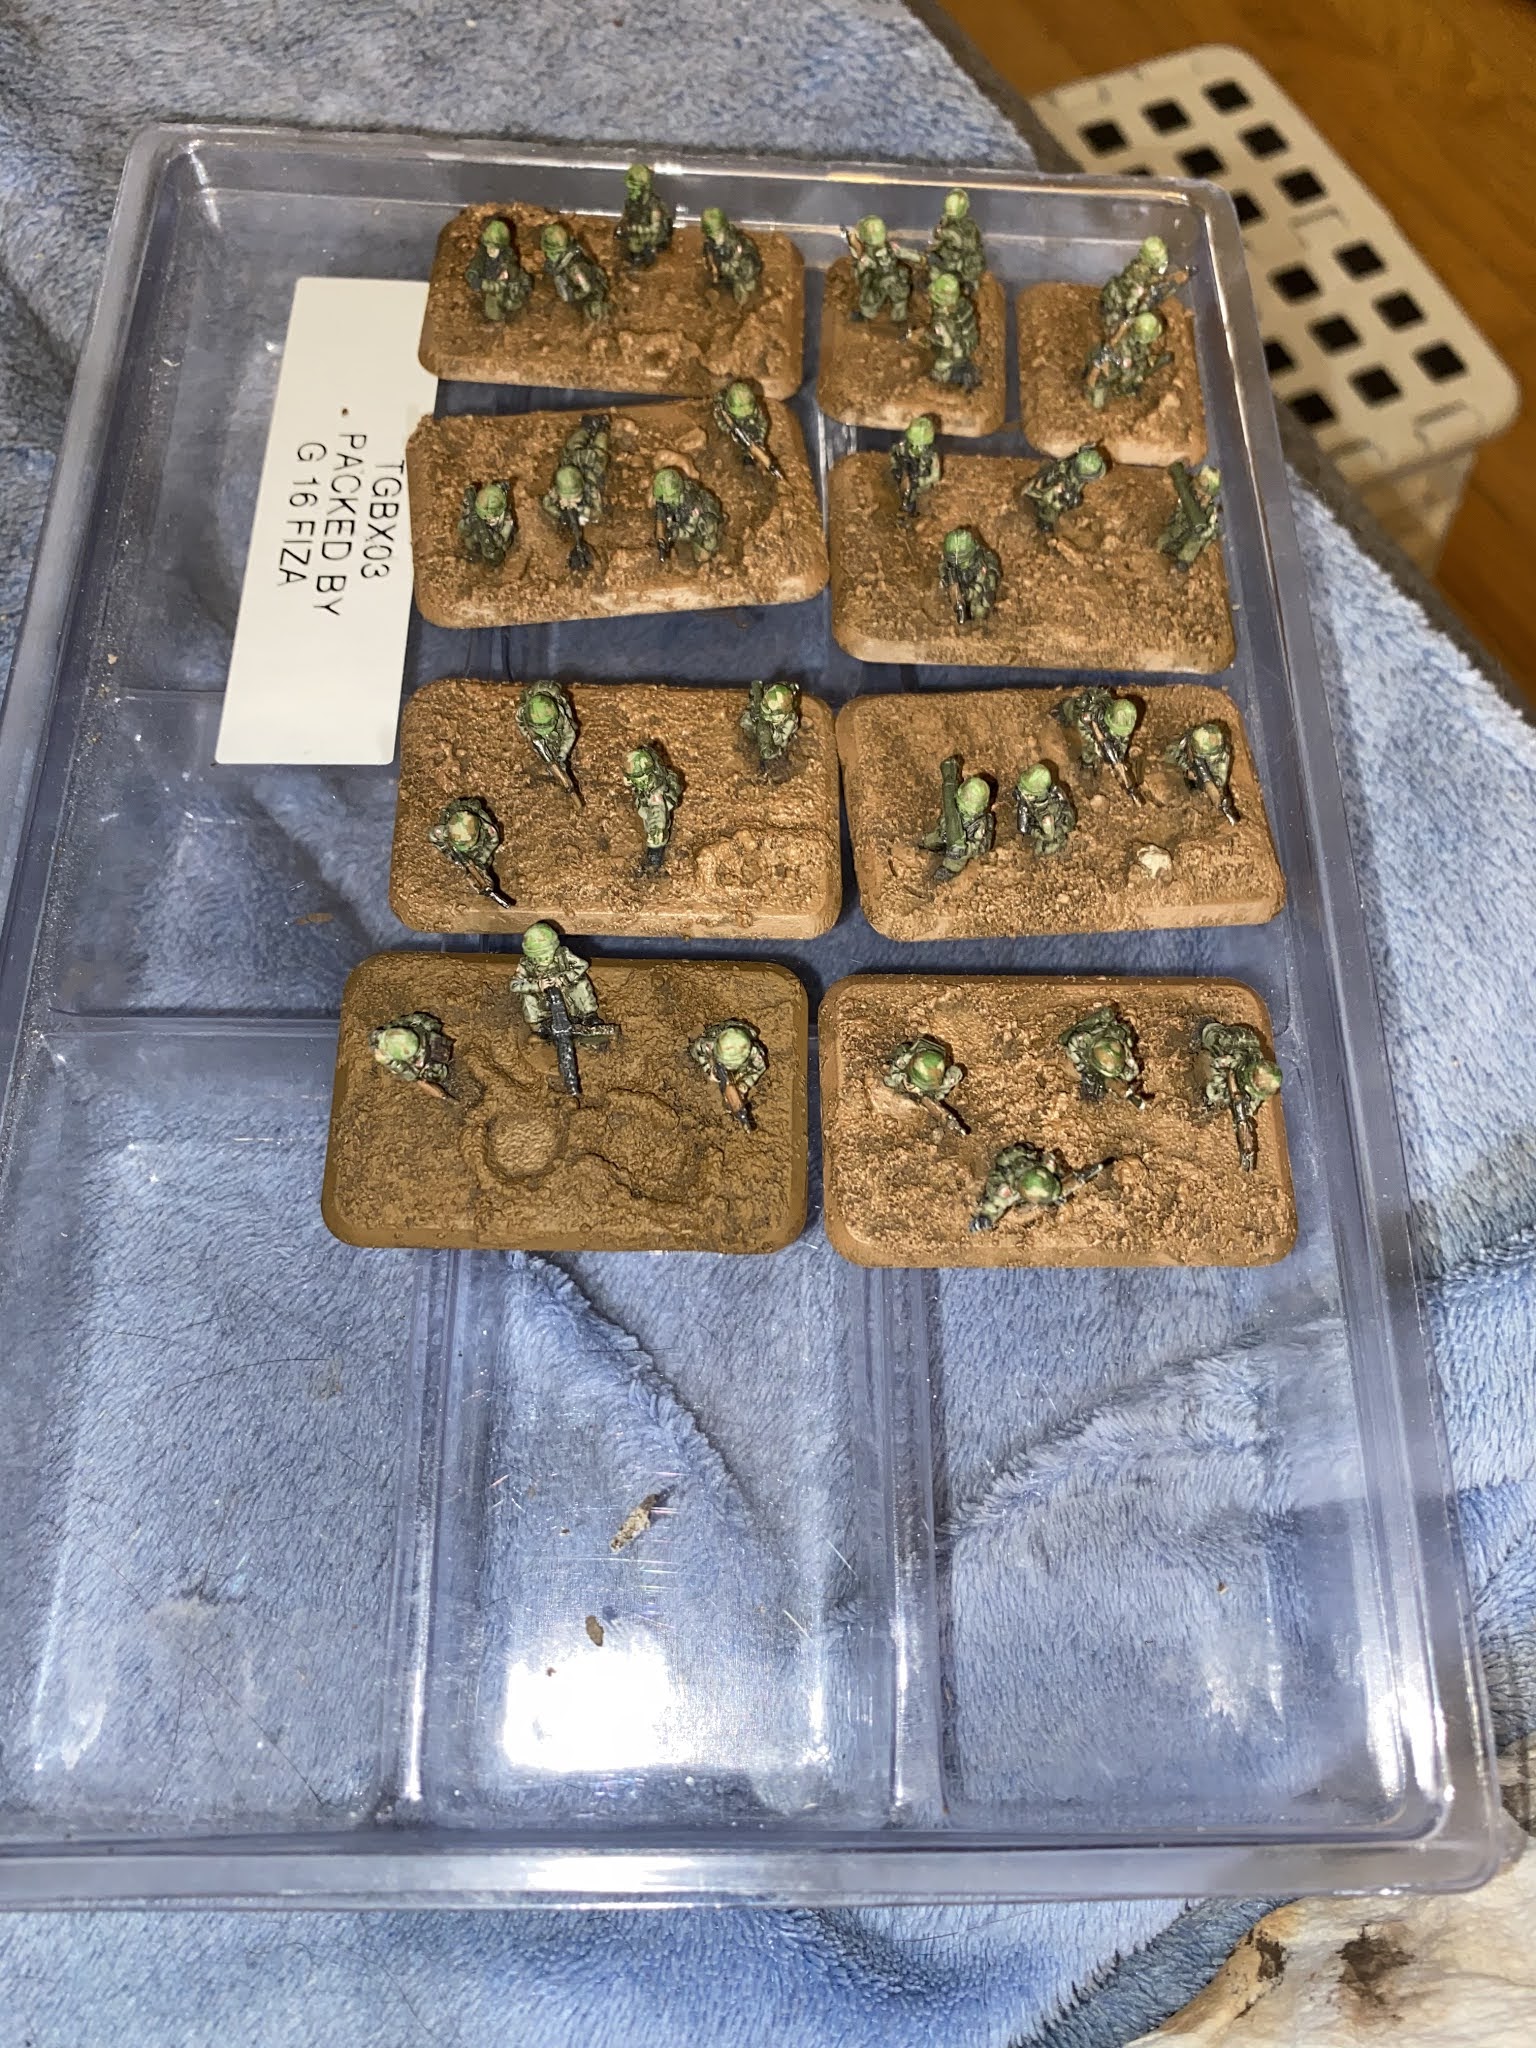
For anyone that has followed religiously, you may recall that late summer I finally got around to basing my Canadian grunts and Soviet rifles for Team Yankee. Given that this is a special project for me I really wanted to take my time on this and make sure next steps, painting, etc were deliberate and achieved my goal.

 
From this work though, and to be honest, because I needed something that roughly fit into the 8th day slot, I thought I would write up a quick tutorial and guide showing my colour progression for my bases including flocking.
 
As always, I hope all you enjoy the post and that all is well...happy New Year to you, may 2021 be a good one for you all...we'll see how close I can get to #12 by the time the ball drops!!

The end results first...
 
1. Battlefront has been recessing their bases for some time now. It takes away the worry over evening out the surface or need for filler, you can get away with a technical paint from Citadel or just glue and sand. In this pic, I started with sand and then went over with some Citadel Stirland Battlemire and then I  quickly laid down some Vallejo burnt umber.

2. After going over the bases with another wet layer of burnt umber, I then added a wet-dry layer of VJ flat earth...I’ve left one base to show the differences in the colours.

3. Next step was to hit the bases with a dry brush of VJ beige brown...I may have gone over a couple of select spots to emphasize the tone...

4. After the beige, I then put a dry layer of VJ tan earth, reducing the amount of coverage from before and certainly from the flat earth layer...

5 & 6. At this point I want to make my last highlight a very sparingly-applied layer of VJ Iraqi sand...which I then follow up with Army Painters strong tone wash...I don’t apply the wash everywhere! Only in those spots where I want to reinforce tones or a feature, but not over the entire base.

7. At this stage you can paint on any other effects you may have, for example...if you have some urban debris, then you could paint up highlights or touch up details. I did this for my Sov’s with random ‘grey’ toned building debris, etc.

8. Finally, you can get any flock down that you’d like...


Saturday, 26 December 2020

The 3rd Post Over Christmas...

For the third post over Christmas,

I have to show to you,
Some Fallout figures and a random marker makes three,

2 pop icons...from Studio Miniatures 
and a figure from HassleFree.

The random figure is a 3D printed base or marker that I got from my LGS...they were giving them away earlier this year so I thought I’d try painting it up with a winter/frostgrave setting. It painted up pretty quick and was a nice diversion.

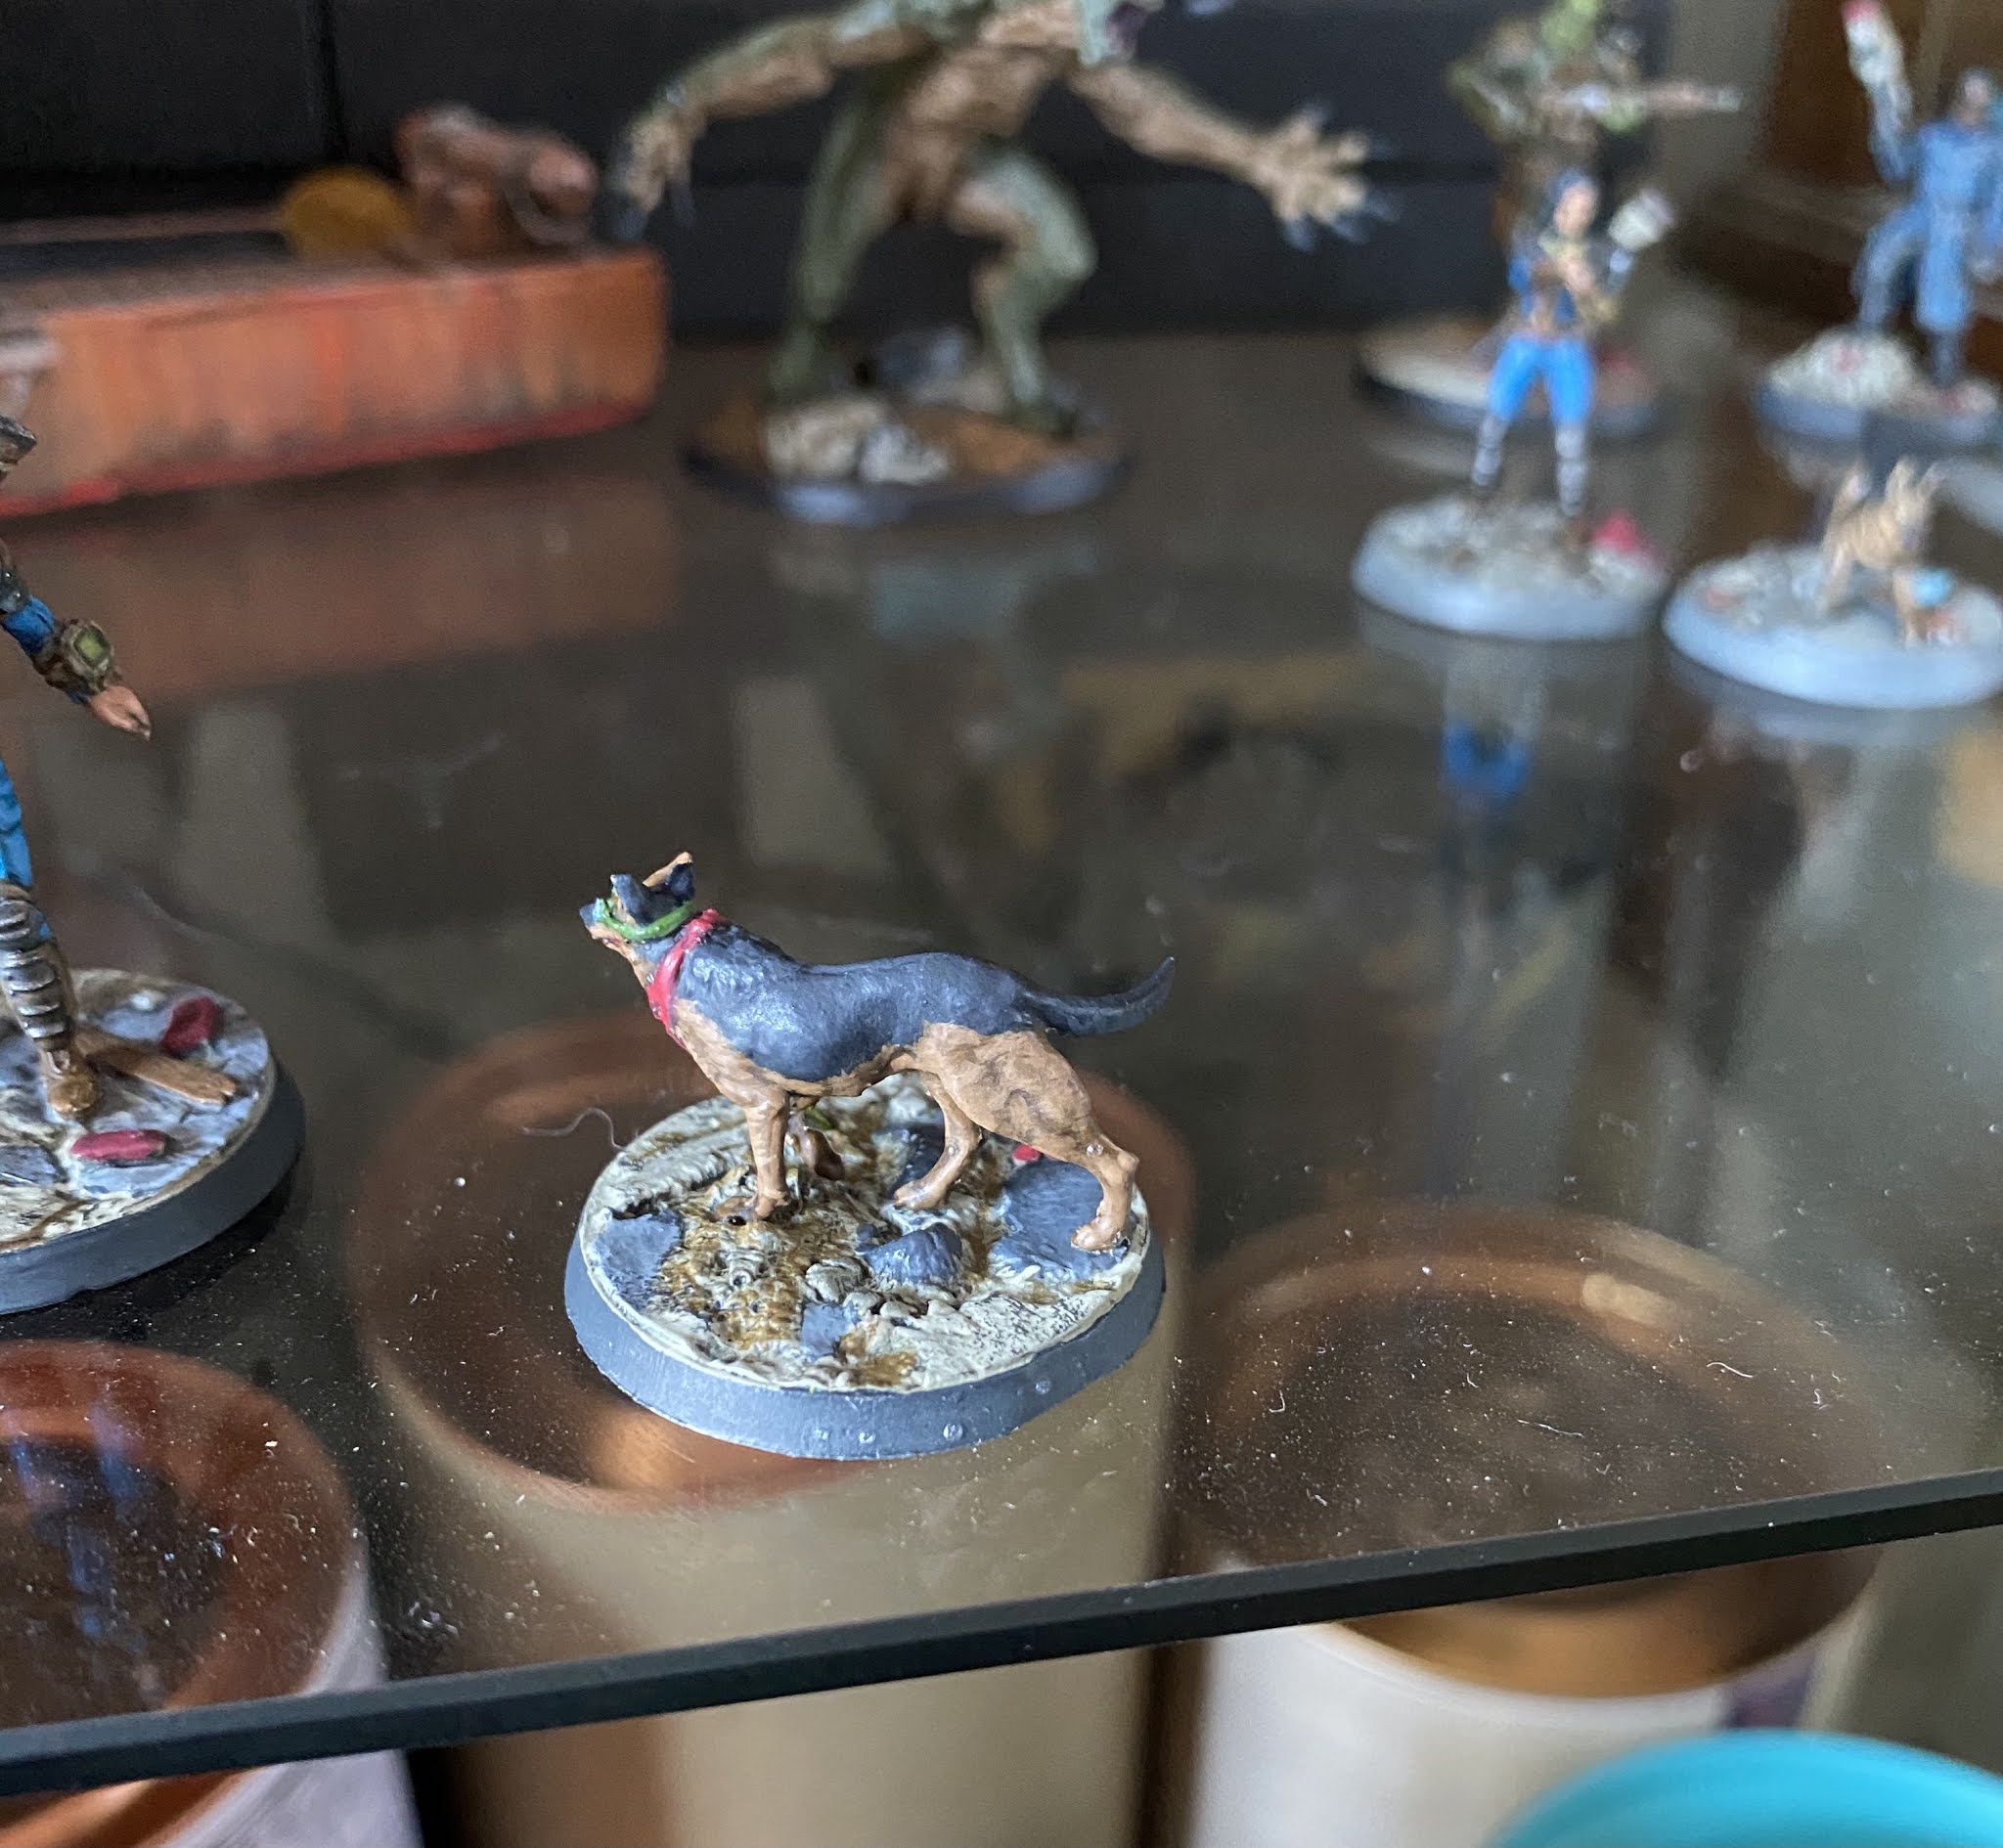
The 2 fallout figures are from Wasteland Warfare and the Heroes of Sanctuary Hills box. The set includes a male survivor (compliment to the Nora survivor from the starter box), an alternate version of Dogmeat, and Cogsworth. I painted up the survivor and Dogmeat...couldn’t resist those two...Cogsworth, well he’s probably my least favorite from the video game...so he can wait a little, lol.

I hope you enjoy and taste everyone’s Christmas was safe and well.

Dogmeat, “uparmoured” with goggles and neckerchief.

Dogmeat with the survivor...

The marker on the left, with our Fallout survivors...

The Survivor...

Hike up Lead Mountain 2020
 
Painted:

28mm               62 (+3)
15mm               135

Bought:            5 (+3, Survivors - Heroes of Sanctuary Hills)

Progress:          +192