For my eighth post over Christmas,
I thought I would write up for you...
An 8 (-ish) step tutorial...
...for basing the figures you do...
7 Harry Potter figures...
6 Marvel Characters (heroes and/or villains)...
FIVE MAIN CHARACTERS...<cough...from the Night’s Watch starter set>
2 figures from Studio Miniatures; and
1 from HassleFree.
Hello folks,
For anyone that has followed religiously, you may recall that late summer I finally got around to basing my Canadian grunts and Soviet rifles for Team Yankee. Given that this is a special project for me I really wanted to take my time on this and make sure next steps, painting, etc were deliberate and achieved my goal.
From this work though, and to be honest, because I needed something that roughly fit into the 8th day slot, I thought I would write up a quick tutorial and guide showing my colour progression for my bases including flocking.
As always, I hope all you enjoy the post and that all is well...happy New Year to you, may 2021 be a good one for you all...we'll see how close I can get to #12 by the time the ball drops!!
The end results first...

1. Battlefront has been recessing their bases for some time now. It takes away the worry over evening out the surface or need for filler, you can get away with a technical paint from Citadel or just glue and sand. In this pic, I started with sand and then went over with some Citadel Stirland Battlemire and then I quickly laid down some Vallejo burnt umber.

2. After going over the bases with another wet layer of burnt umber, I then added a wet-dry layer of VJ flat earth...I’ve left one base to show the differences in the colours.

3. Next step was to hit the bases with a dry brush of VJ beige brown...I may have gone over a couple of select spots to emphasize the tone...
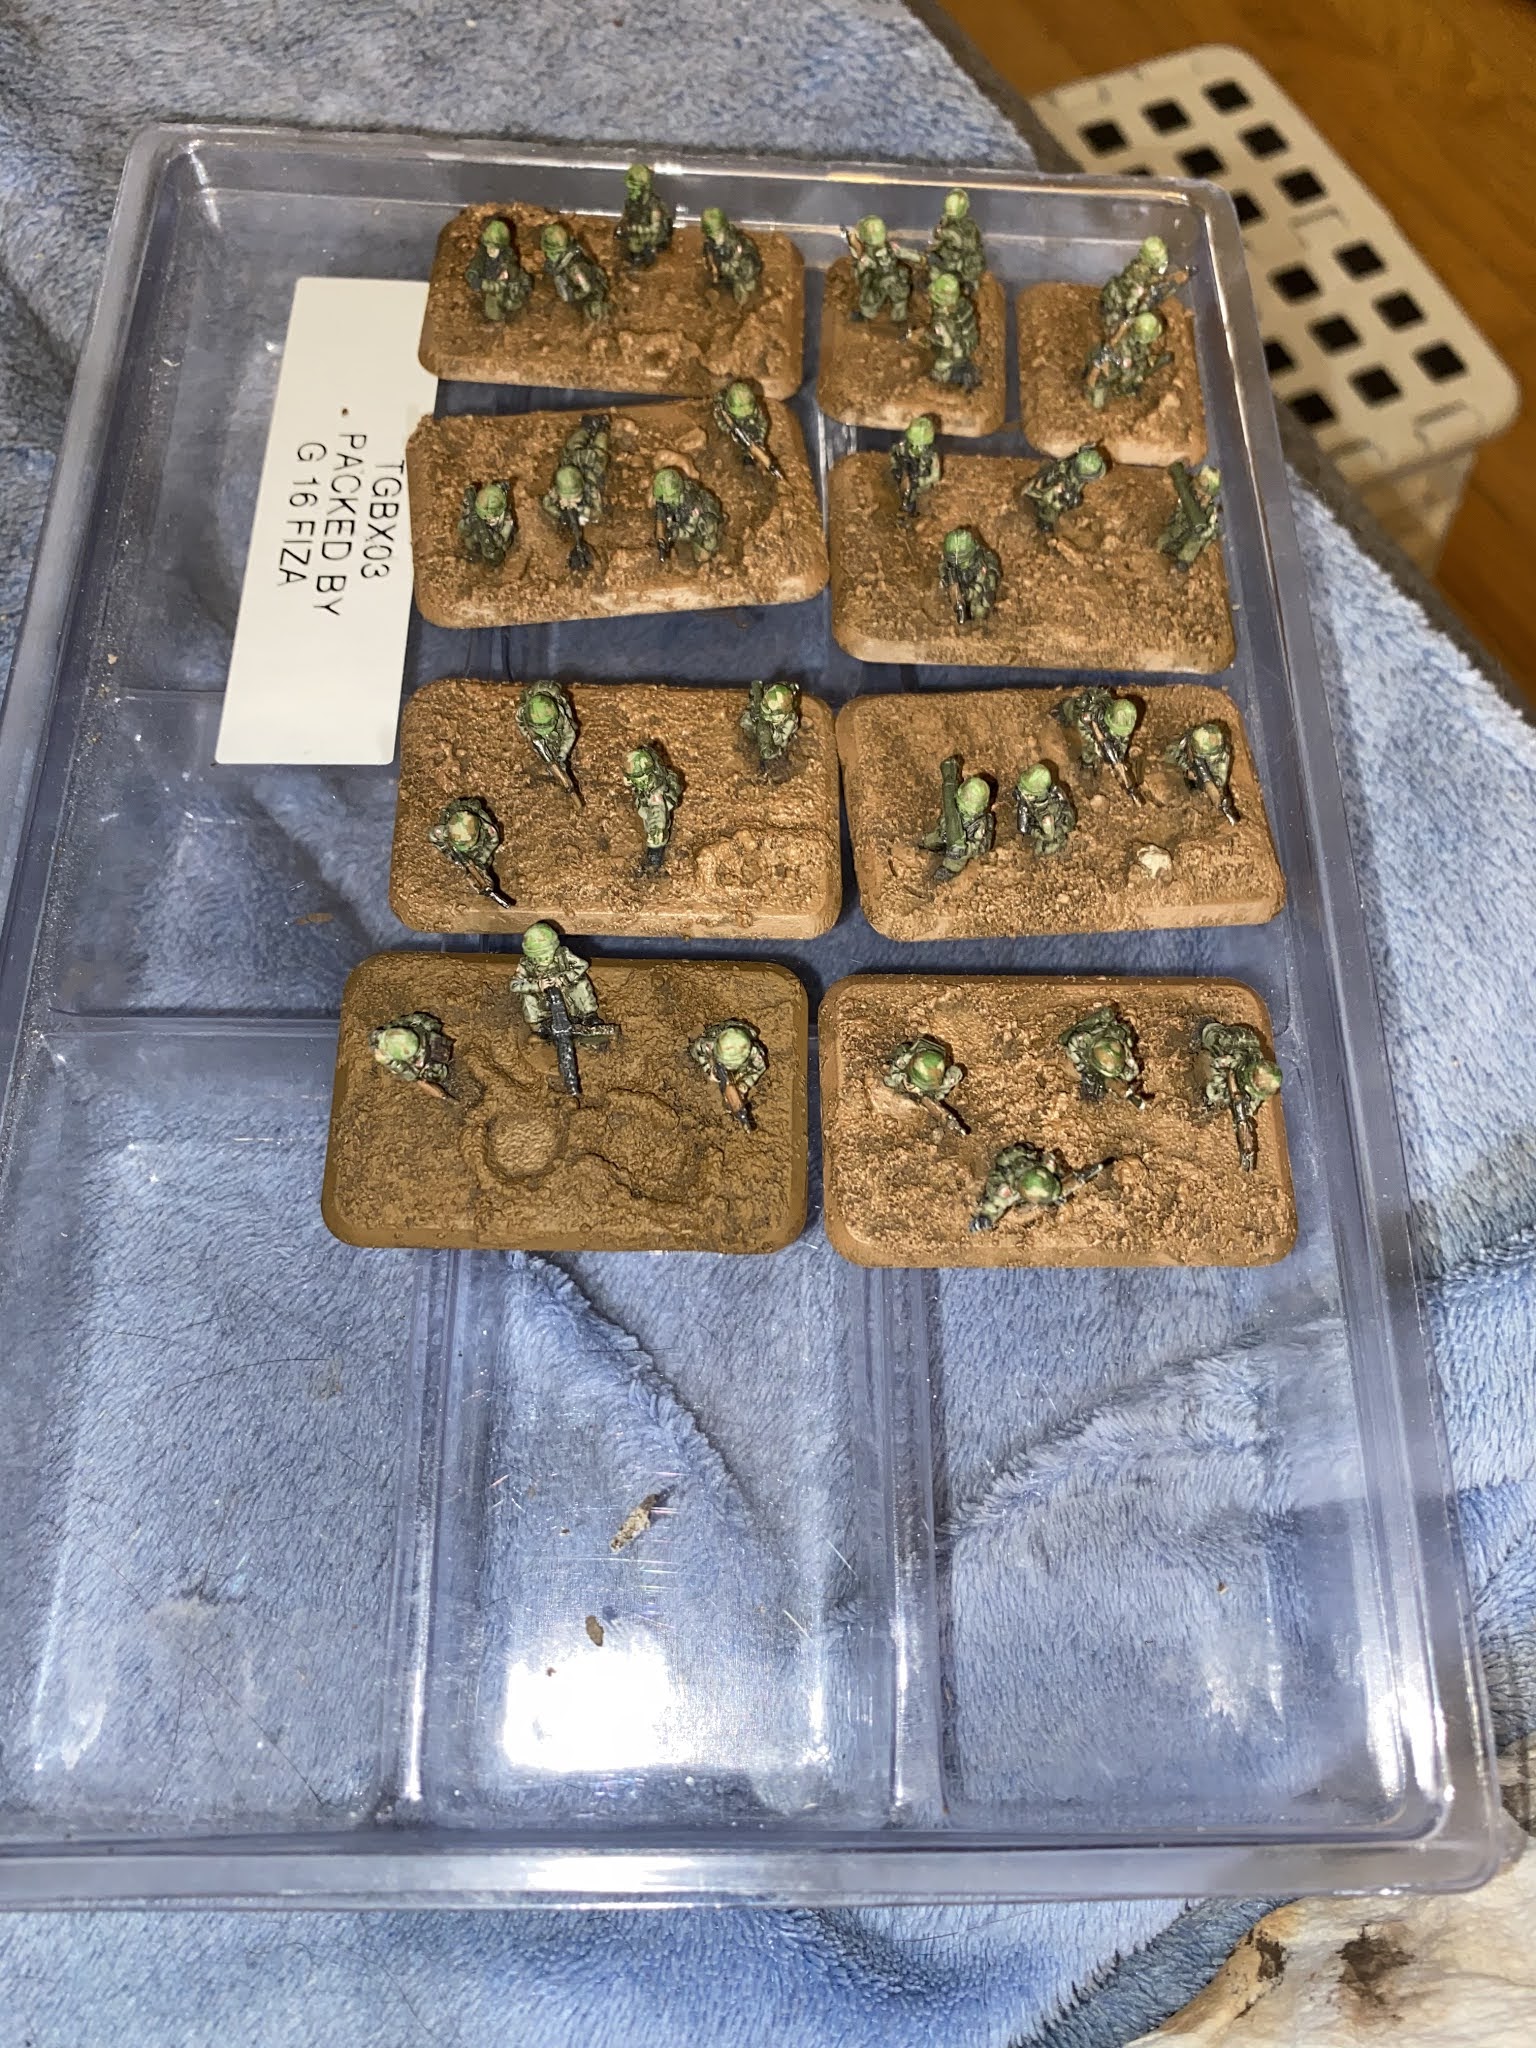
4. After the beige, I then put a dry layer of VJ tan earth, reducing the amount of coverage from before and certainly from the flat earth layer...

5 & 6. At this point I want to make my last highlight a very sparingly-applied layer of VJ Iraqi sand...which I then follow up with Army Painters strong tone wash...I don’t apply the wash everywhere! Only in those spots where I want to reinforce tones or a feature, but not over the entire base.

7. At this stage you can paint on any other effects you may have, for example...if you have some urban debris, then you could paint up highlights or touch up details. I did this for my Sov’s with random ‘grey’ toned building debris, etc.

8. Finally, you can get any flock down that you’d like...

No comments:
Post a Comment