Showing posts with label US Army. Show all posts

Saturday, 13 November 2021

Let Me See Your WARFACE - Grunts for The Nam

Howdy folks, 
 
I hope you are all fine and well. As the title to this post says, its all about the grunts on this one.


Continuing my latest bout of inspiration and motivation around  gaming some of The Nam and fashion this around a Vietnam Aces campaign, I am finally getting to some additional combat platoons. Having a quick planning discussion with the guys, we are anticipating 20/40/60/?? as the point levels for this venture, and I think I've said before this is pretty consistent with the Aces escalation campaign format that BattleFront came out with.

Now, given my past interest in the era and original painting run with my Air Cavalry force, I was already prepped...my Air Cav was good to go for a few rounds worth of escalation. However, given that we will be having a random number of battles per round, I thought it would also be good to have some options and maybe another force on the field with some flexibility in deployment/back story.
 
You can see the summary of my previous painting for my Air Cav...I almost choked when I saw it was from 2015. To be honest, I still have some rotors to finish up...sigh.
 

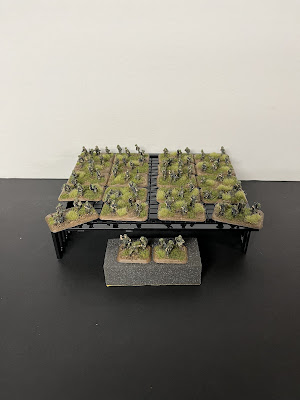
So, as you can see from the video above, my main inspiration for this force was around the Marines and the rifle company. I've already painted up some M60 teams to go with my combat platoons, but with this post, you will see that I now have 20 stands of infantry for 2 x Marine combat platoons - which is more than enough for round 1 and gets me part way to round 2. And, if I really look for flexibility, I can re-jig these grunts into an Airmobile or leg infantry rifle company with 3 platoons. Of course, to do that I will need to add in a few stands (another 2 x M60, maybe some 90mm antitank teams, and one more infantry stand) so that I could have 3 platoons with 7 stands each.

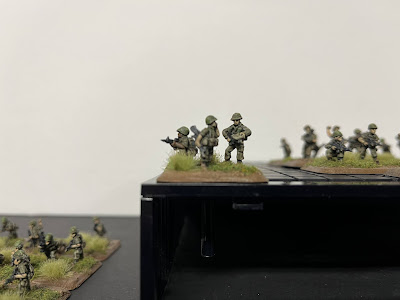
Anywho, here are my grunts for the Nam, 20 stands of combat platoon hell to unleash, and course 2 stands of formation commanding goodness.

Have a good one.

OOH-RAH MARINES!!! The combat power of the force... 


I have to say, the BattleFront Vietnam figures have really progressed over time from their initial Wargames Illustrated run to the AUS/NZ infantry figures. The poses have become more dynamic and the sculpting of individual kit got much better and improved. The AUS/NZ troops really are the Cadillac of the range.  You can see the mix of the range throughout the platoons, but really evident in the Formation Command stands. 


2 x Marine Combat Platoons, now becomes 3 x US Army Platoons. All I need now is to fill out the numbers with another Platoon Command stand, 2 x M60 teams, and 1 x Medic/Corpsman for the company.

Lead Mountain 2021
Painted:
 
Large scale              3
28mm                     23
15mm                   102, +78

Bought                  24

Progress               +104


Wednesday, 6 February 2019

Past Games...Part 1 - Team Yankee


Howdy folks,

Another day, another evening of a mixed bag of weather...tonight it is snow with freezing rain and drizzle...apparently overnight; so it should be rather interesting in the morning.  As I said after Solo and the Fett Man, I wanted to post up some pics from the last few games that I had last year...now, for the most part, I cannot remember the exact game details, BUT the games themselves were still very entertaining and were an opportunity to get the figures on the table.

To kick these posts off, I have a Team Yankee summertime firefight involving NATO (Can-US force) and Warsaw Pact (I believe mostly East German).  The points were roughly 100-150-ish per side (heavy on the ish).  For me, this was a chance to get some 4 Brigade troops on the table, in this case a command Leopard C1 (in panthers clothing, 2 platoon of 3 x C1's, and a half battery of M109s (while still in their primed suits, they do have the proper long barrels).  If I recall, Mike fielded a Marine force of hummers...and stuff, oh and some really critical cobras.

Duncan was the bad guy...he had a bunch of East bloc kit...tanks, bmps, oh my...a bunch of stuff to get in the way...can't remember the exact make up...I'm sure he had some AAA in there as well.

Anyway, I think the scenario was a reserve type engagement with NATO attacking and East Germans having stuff in reserve until turn 3...standard FoW fare.  While the west was pumped, they sadly did not have the metal behind them to put a big dent in the WP force...I'm happy I got the models out, but some better rolling on my part...and some much more worse rolling on Duncan's really would have helped the situation.

Anyway, the table looked good, the models were fine, and the afternoon was very entertaining.

Enjoy the pics.  Cheers.

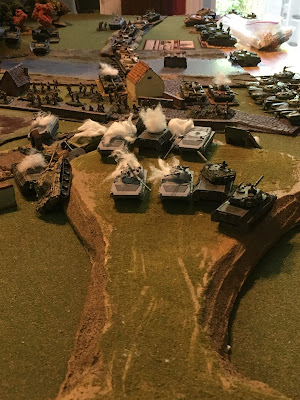
Initial setup - right flank...guns on the edge, C1's leading.  Enemy troop carriers at the opposite crest of the ridge

Steady advance on the right...I totally forgot to take pics of the left...

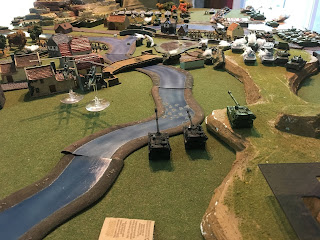
a boatload of hurt coming across the pontoon bridge...commies everywhere...


WHATS NEXT
 
1. some more pics of games.
2. some pics of the first painted figs of the year, completed in January.
3. some pics of a new game I just picked up as well...


Monday, 8 January 2018

Cold War Slugfest - Team Yankee Battle Report

Hello folks,

Just before Christmas I had the chance to get together with Mike and Duncan and have a go at some Team Yankee.  Duncan and I were on the hook for about 40 points each of Warsaw Pact troops, and Mike was on the hook for 80-ish points of US army. 

As Stripes had just been released, Mike elected to go with some hummer mounted troops to fill out the back end of his US armoured list.  I elected to try something a little different and push an infantry formation with recce, AAA, arty, and a small tank company in support.  Duncan elected for some East German heavy metal.

I'll let the pics do the talking on this one...

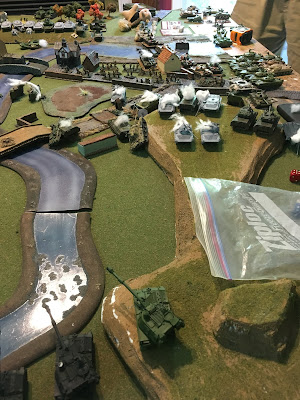
view of battlespace from my left flank...sweeping over the WP FEBA...my troops are in the foreground, Duncan is deployed on the right flank...
Big picture view of the battlespace...Mike is on long end on the left...Duncan and I are on the right...we're deployed around a little ville, Mike has some hills to contend and forest to contend with.
One platoon of M1's...an air defense platoon of Vulcan armed M113's...behind them you can see Mike's hummers...he brought these guys in for their stinger manpads...neither Duncan or I brought in any air support.

I spearheaded with my BRDM-2's...they quickly took some hurt from Mike's 113's...his M1's crested their hill and took up firing positions on my T72's...I didn't have a large company, so any hits definitely hurt...
I'm pushing forward, BMP-2's are moving a little behind the heavy metal...I'm trying to set them up in firing position so they can put some missiles on the M1's and some 30mm on the 113's.
anti-tank missile hit...one M1 down...but he is doing a better job than I am in getting shots downrange...
looking towards my lines...burning BRDMs and T72's...
the Vulcan 113's move forward and get in range of my first MR company...BMP's taking hits and infantry are bailing out...most of my grunts pass their saves and take up position in the ville.
Duncan was making slow and steady progress on the right flank...his T55 horde was making good rolls and Mike was having a hard time getting hits on them.
I haven't been able to do much to his M1's...I think Duncan was distracting all the tanks at this point...but I did start exacting some revenge on those damn Vulcans...my BMPs kept a pretty steady rate of fire on the VADS platoon and started making headway.
Duncan maneuvers one of his tank companies towards the forest while maintaining a steady firebase with the other...Mike is redeploying his M1's trying to maximize cover and firepower...
I can't remember which vehicle did it...either BMP or ZSU fire...but Mike loses one of his cobras...
The hummers come forward to push the objective...Duncans tanks are taking the hillcrest...
I'm pushing forward with my BMP's and laying down some arty with my Carnations...
Mike goes kamikaze with his last cobra to try to take out Duncan's infantry that are defending one of our objectives...it didn't work out...
Mike has to push the M1's on my flank over towards the objective...they are now taking main gun fire from Duncan and missile fire from my BMPs...
Duncan re-establishes his line facing towards my left...my BMPs destroy the VADS platoon and combined with my artillery, they push back the hummers...
we collectively push both objectives on our respective sides of the river...
It didn't go Mike's way, however this was definitely one of the most contented games I've played of TY yet...having grunts in the mix changed the flavour for me...and made me hope that I'll see more infantry forces in the future...