For the last day of Cangames, I had the chance to get in a much anticipated game of Force on Force (FoF) run by my buddy Chris. Having played a few games of FoF against and with Chris before, I was looking forward to the game.
Overall objectives were pretty simple, US forces were to secure a high value target (HVT) in a local village, while Local forces were to disrupt, inhibit, and potentially defend the HVT from capture. Elected to take on the role of the US commander, Chris gave me a quick brief on the phases of the operation, #1. Ingress into the ville and take station around the main village building/mosque, #2. Secure the HVT and load them into the vehicles for extraction, and #3. Exfil and egress from the ville. Limiting factors for the US, while egress could be along main road leading South, ingress had to ignore this route as it would give too much warning to Local forces, and there were some tight timing constraints as each objective should be completed within 3 turns each.
Initial US forces were 4 humvees with a fireteam of 4 pers each (2 x M16/4, 1 x M16 w/203, and 1 x SAW…I think), each trooper had body armour, and were considered well supplied if within line of sight of their vehicle with no obstructions in the way. There were no Local forces on the table, but there were several groupings of locals around the ville.
The ville…looking south, main building/mosque in the centre marked with HESCO barriers. There were 2 roads from the north on either side of the admin building, and 2 on either side from the east and west, you can see the main road leading south straight down the centre of the table.

You can see the initial ingress by the fireteams…one humvee per side coming in from top and bottom of the pic. 2 more teams coming in from behind the admin block on picture left. Again, the master plan was to ‘drive casual’ into town so as not to draw too much attention. So, a tactical move later, you can see a roadblock being placed near the lower humvee.

A better perspective from the south, you can see all 4 humvees in the town, roadblock in place on the left, and groupings of civilians blocking the way of the vehicles. The team near the roadblock takes the initiative and starts to discharge weapons into the air to disperse the crowd - to some effect.


At this point, I push the other teams to expedite to the building and converge on three sides (north, east, and west). The east team drives his humvee into the HESCO barrier and drops a smoke grenade to distract locals and then dismounts.


As US troops dismount, robes are thrown aside, scraps of roadside debris are moved and weapons are taken up by the locals. As well, we start to see Local forces look down at the street from various rooftops. It is at this point that US forces have achieved objective #1 - I think it took us 3-4 turns to get here, At this milestone, Chris then tells me that my east and west fireteams were were under game control of insurgent/local players (so while they were in fact US troops, the game players intentionally made poor decisions to impede my master plan)…nice twist and explains the dumb-assery, lol.

Looking westward, you can see the roadblock, the smoke plume from the other team, and humvees on either side of the mosque. The HVT, a high ranking financier is hiding on the second floor. The road-blocked humvee stays in place, and the fireteam deploys to the nearby building with the intent of taking over the ‘hotspot’ to remove it from play (FoF hotspots are areas that insurgents can deploy to if they role that number, between 1 and 5, if they role a 6 they can choose - if the hotspots are still active).

I can’t remember if I rolled these defensively or offensively, but either way it gave me considerable impact on the team I was engaged with. Having to reach 4’s or better, the US forces used D8’s and Locals used D6’s to reflect training and quality of troops. So in this case, 1 miss and 4 unbeatable hits!

US troops are engaged on all sides of the mosque…some teams are taking hits but I think wounds were relatively minor at the time.

My team prepares to enter into the mosque and begin the search for the HVT…

Some more insane die rolls…fairly respectable on the US side, and insanely hot on the Locals side…only 2 of my shots make it through to the insurgent team that has sprung from the lower parts of the building that my roadblock team is on. The fireteam there is able to knock hotspot #3 out of commission and spend subsequent turns trimming down the insurgents near them.


The US forces are heavily engaged on 3 sides of the mosque. The HQ team breached into the building and were met with armed insurgents on the bottom and top floor. A well rolled initiative die gave the US the chance to move first and reduce the troops returning fire against them. The team was able to secure the HVT and started to move to their humvee…thus we reached milestone #2.


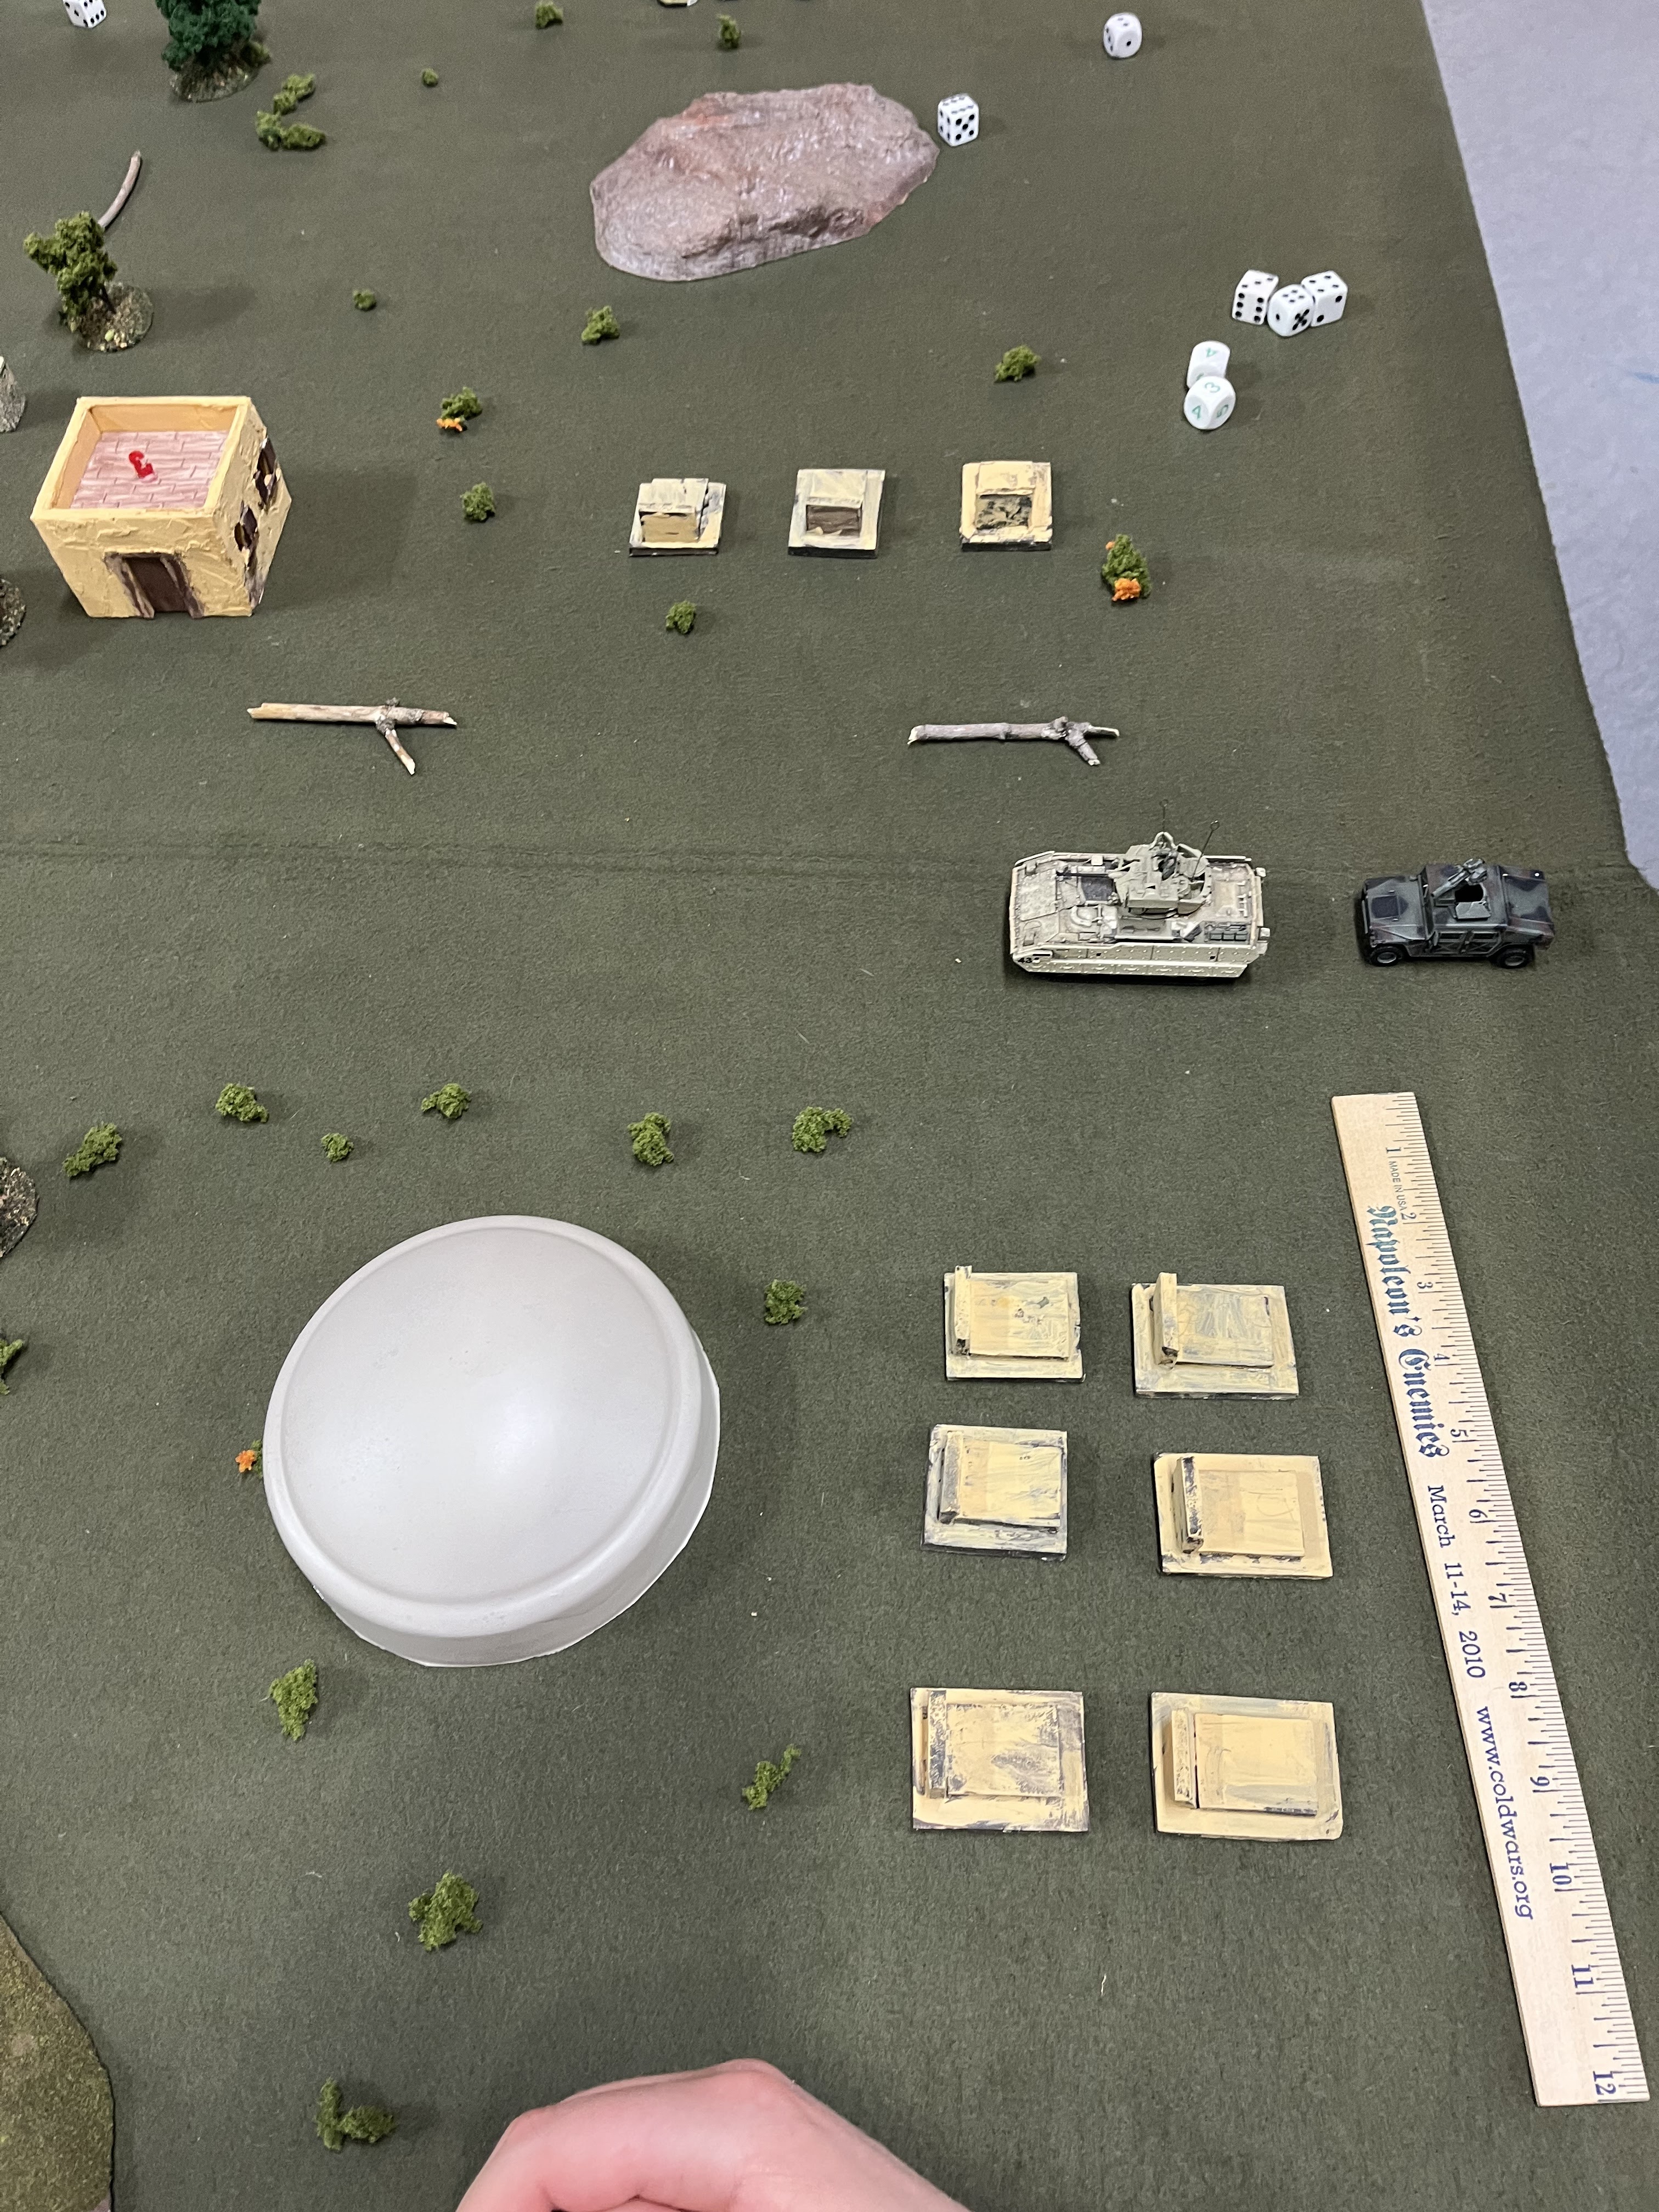
Given the challenges that the US forces were having with the ingress and securing the building - we had taken a few casualties and KIA - once the HVT was secured, a quick reaction force (QRF) was available to provide some assistance. Inbound from the south, a Bradley and humvee TOW carrier bring up some heavier metal and firepower.
With the inbound QRF, the next few rounds were f’ing busy…the HQ team secured the package into the humvee and were promptly swarmed by insurgents. If these had all been civilians it would have been a far stickier situation…as it was, my fireteam lit up the grouping and then the fireteam that had been on the north wall re-entered their vehicle (taking their wounded and dead with them) and then went Chicago gangland on everyone and did a drive-by of the swarm as they made their way south.


The western fireteam continued to trade shots with the insurgents near their position. Ultimately they were able to clear a path to their humvee and proceed to the southern road.


At this point, the situation gets even more fluid. The Chicago crew continue southwards to egress from the table…I think they do fairly well overall (casualties aside). The HQ team continued to engage with insurgents who were trying to rescue the HVT - on a few occasions we had to make rolls to see if the HVT was accidentally hit by friendly fire…spoiler, he made it through unscathed, and DAMN we had some hot dice (4 rolls, all 8’s!!)…
At the same time, the Bradley and TOW carrier were heavily engaged with the carrier taking a significant hit (mobility kill if I remember correctly). All fireteams make for the south moving as quick as possible, the HQ humvee with the package ended up taking engine damage and could only do tactical moves (reduced movement, half).


The insurgents had a few moments of glory as well…they had done an excellent job of keeping the US forces occupied and had inflicted some fairly heavy casualties - all fireteams except the HQ had either dead and/or wounded. As well, they did pick up a technical from a Frog of War card…

Which was promptly lit up by the west-side fireteam and knocked out…much to their chagrin, lol.

However, the biggest break, which I didn’t fully know about until after the game, came from another Fog of War card. This made the last turn extremely critical…with the humvees reaching the south edge of the table, my final plan was to fully egress, have the Bradley pull up to the TOW carrier to extract the crew and then egress behind the humvees. The rub was, I would have to roll to win initiative so that I could act first.

I was able to make the roll and get the HVT and remaining vehicles off the table. If the insurgents had been able to take the initiative, thanks to the Fog of War card, they would have had a very powerful anti-tank roll at their disposal which they would have used to target the humvee with the HVT. In this case, it was a US victory but was fairly costly in resources and troops.

BUT a very enjoyable game!!
No comments:
Post a Comment