Howdy folks,
After painting some
Stormtroopers I was asked if I could reference the paints that I used and I thought I'd go that extra step and post up a guide...I approached each figure differently and used a couple of variances with each so I'll approach the guide the same way.
Building the bases
For each figure, the general idea and colour choices for the bases was the same...I used some Starbucks stir sticks and cut these up to act as trenchline/battlefield duckboards. I glued these to their respective washer/coin and let that sit. Next I took some Woodland Scenics white glue and covered the base and flocked using sand...generic playground sand works. After I had let it dry for a day or two I basecoated everything, figures and bases in flat/matte black and went from there.
Painting the bases
1. basecoat the bases with 80/20 mix of Vallejo 822 German cam black brown and water;
2. take Vj 941 burnt umber to entire base;
3. long live the dry brush...Vj 983 flat earth, dry but not too dry...more like dryish, make it look the way you like without obscuring the burnt umber;
4. another dryish layer of Vj 875 beige brown...this starts to make contours and relief 'popout'...
5. this layer is Vj 874 tan US and is a dryer brush than previous...just looking to get what stands up from the rest of the base, hit the edges of the duckboards to show some weathering;
6. another dry brush layer, this time Vj 819 Iraqi sand...again, just lightly brushing the edge of the duckboard, and the top and edge of the dirt
7. final dry brush of Vj 976 buff...very very martini-like dry...hell, lets call it a dusting on the edge of the washer/coin, the most prominent tops of the dirt and barely on the duckboards; and
8. take some Army Painter strong tone wash and use this to finish off the duckboard...specifically, the space between the boards and around the feet of the troops.
Ultimately, adjust the above to get the look you want...if your battlefield is a wet mess, then less Tan US and maybe more beige brown and strong tone...I was trying to capture the underlying dankness and wetness of the battlefield but also that claylike 'whitening' of dried mud that you see in pictures.
Do what looks good to you.
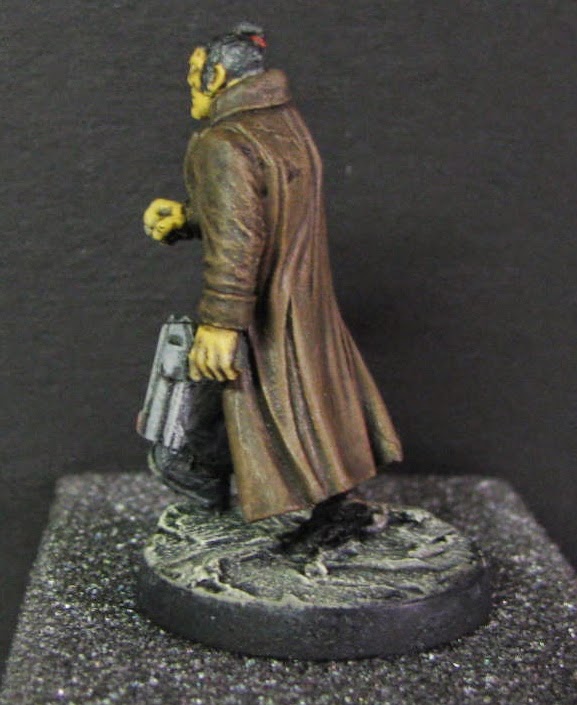
(left to right)...Grenadier Jake, Pistol Wilhelm, Body Armour Hans, and Gasmask Fritz...
Painting the Troops
1. basecoat the entire figure with Vj 995 German grey 80/20 paint:water;
2. follow up with Vj 862 black grey 90/10 paint:water over the entire figure;
Grenadier Jake
3. 90/10 mix of Vj 830 German fieldgrey for the
tunic,
pants, and
puttees;
4. Vj 830 to the
tunic and
pants;
5. 75/25 mix of Vj 830 and 837 pale sand to
tunic and
pants...when painting this one, err on the dryer side...not intended to be a wet brush. Treat as drybrush and take a few extra strokes over the cuff edges and knees and elbows and wrinkles in the tunic;
6. To finish the
puttees, I took a mix of Vj 830 and 837...probably around 50/50, I wanted these to look noticeably lighter in tone than the uniform;
7. The
helmet was a camouflage pattern of Vj 914 green ochre, 981 orange brown, 983 flat earth and 979 German cam. dark green...just add a line of black to separate the colour blocks...I randomly made the pattern after a picture in an osprey book;
8. The
ammo pouches were initially given Vj 983 flat earth, then 914, and then mix of Vj 914 and 988 khaki, and then mix of Vj 988 and 884(?) stone grey;
9. The
rifle was Vj 983 flat earth on the stock and wood and then wet-dry brush of Vj 875 beige brown. The barrel and fittings were painted with Vj 863 gunmetal;
10. The
dagger handle was Vj 995 and then mix of 995 with Vj 863 (approx. 50/50)...the
scabbard was Vj 875 beige brown and then mix of 875 with Vj 874 (approx. 50/50);
11. The
gas mask canister was similar to the handle...Vj 995, followed up with a drybrush of Vj 863;
12. The
grenades: the stick
handles were painted with Vj 983 first, dry brush with Vj 875 beige brown, and then dry with Vj 874 Tan US. The grenade
head was Vj 979 German cam. dark green;
13. The
canteen was painted with Vj 983, 875, and then a drybrush of 50/50 mix of Vj 874 with 837 pale sand;
14. The
e-tool: the
handle is the same as #12, the
head of the shovel was Vj 995 with dry brush and/or 'streaks' of 863; and finally
15. wash using Army Painter strong tone...
Pistol Wilhelm
3. The
pants were done the same way as #3 and 4 for Jake;
4. The
tunic was wetbrush of Vj 886 green grey, followed with a 75/25 mix of 886 and Vj 830 German fieldgrey emphasizing the wrinkles and edges. The
collar was left darker than the tunic (this was an osprey tidbit I found in my research);
5. The
puttees and
kneepads were done with Vj 874 tan US;
6. The
pistol was Vj 863 gunmetal with a dry brush of 863 and Vj 837 pale sand;
7. The
large pouch or
bread bag was Vj 988 khaki and then mix of 988 with Vj 914. This was followed up with a dry-ish brush of Vj 819 Iraqi sand;
8. The
belt was Vj 950 black and then Vj 862;
9. The grenades, gas mask canister, canteen, and e-tool were done the same as Jake's #11, 12, 13, and 14...
10. finished with a strong tone wash...
Body Amour Hans
The only different element for Hans is the
body armour and
helmet. His uniform is the same as Jake's as well as all of his other kit...the armour plates on his body and the front of his helmet were a combination of layers using Vj 863 then Vj 979, then dry streaks of 863 with a few streaks of Vj 981 orange brown. The strap for the helmet plate was painted using Vj 875 beige brown and Vj 940 saddle brown.
The
gasmask was fairly straight forward...the facial piece was burnt umber and then mixed with tan US and drybrushed with buff. The
canister is Vj 979 drybrushed with buff.
Gasmask Fritz
There are only a few elements different for Fritz. First, the
bread bag/grenade sacks use the same process as Wilhelm's #7 but I used Iraqi sand mixed with stone grey as the dry brush layer. The uniform pants are the same as Wilhelm, but the
tunic is Vj 995 and 862 instead...this was lightened up and dry brushed using mix of 862 and 837 (75/25). Fritz's
gasmask is done in the same way as Hans's
There were many similar processes at play here...the helmets and personal equipment were very much the same...give or take a couple of subtleties...
Weathering
I wanted to weather the figs and some of the personal equipment to show that these guys had to get dirty to do their job...and after all this work, I wanted a nice quick process that would add to the detail and not detract or worse obscure everything after they were washed...so:
1. Vj 875...very dry layer
2. Vj 874...martini like dry
3. The final layer for everything...martini desert like dry brush with Vj 976 buff.